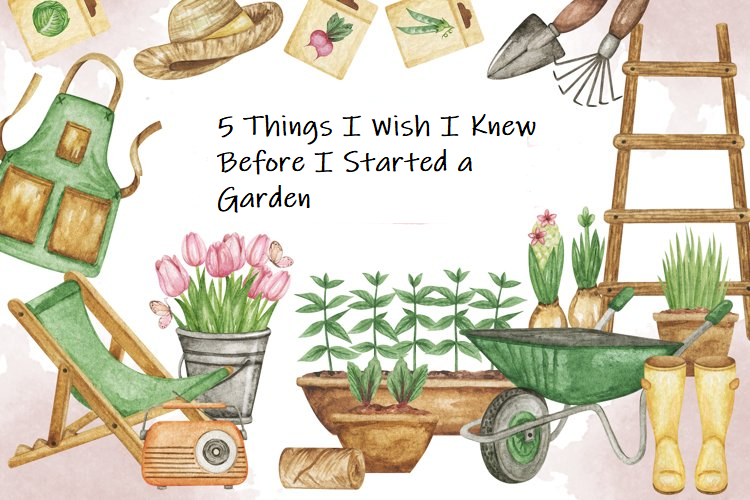
🌼 What Bulbs to Plant in April for Summer Blooms

As the soil warms and spring fully settles in, April is the perfect time to dig in and plant summer-flowering bulbs that will bring vibrant color and joy to your garden during the hottest months of the year. These bulbs love the warming days and will reward you with show-stopping blooms in late spring through summer.

Here’s a list of bulbs to plant in April, along with some care tips to help them thrive:


🌷 Dahlias

Bold, beautiful, and available in nearly every color and size, dahlias are a must-have for any summer garden. Whether you love the dinner-plate varieties or the charming pom-poms, dahlias are show-stoppers.

  • Planting tip: Plant dahlia tubers in well-drained soil and full sun after the danger of frost has passed.
  • Bloom time: Midsummer through first frost.
  • Care: Deadhead spent blooms to encourage more flowers. Taller varieties may need staking.

🌺 Gladiolus

Known for their tall, spiky blooms, gladiolus add vertical interest to beds and borders. They’re fantastic for cutting gardens, too!

  • Planting tip: Plant the corms 4–6 inches deep in groups every couple of weeks in April and May for a longer blooming season.
  • Bloom time: 8–12 weeks after planting.
  • Care: Keep soil moist during the growing season, and support with stakes if needed.

🌸 Lilies

Oriental and Asiatic lilies bring elegance and fragrance to the summer garden. They’re perfect for borders and containers.

  • Planting tip: Choose a sunny spot with well-draining soil. Plant bulbs about 6 inches deep.
  • Bloom time: Early to late summer, depending on the variety.
  • Care: Mulch to keep roots cool, and water during dry spells.

🌿 Crocosmia

These fiery red, orange, or yellow blooms attract hummingbirds and butterflies. With sword-like foliage, they’re a great textural plant.

  • Planting tip: Space bulbs 3–4 inches apart in a sunny location.
  • Bloom time: Midsummer to late summer.
  • Care: Water regularly and divide clumps every few years to prevent overcrowding.

🌼 Calla Lilies

Sleek, trumpet-shaped flowers in a rainbow of colors, calla lilies work well in containers or flower beds.

  • Planting tip: Choose moist, rich soil and a partly shaded spot.
  • Bloom time: Late spring through summer.
  • Care: Keep soil moist and fertilize monthly during the growing season.

🌹 Tuberous Begonias

Ideal for shaded patios or hanging baskets, these lush bloomers bring color to low-light areas.

  • Planting tip: Start tubers indoors in pots, then move them outside after frost.
  • Bloom time: Summer through fall.
  • Care: Protect from direct, hot sun. Keep the soil slightly moist but not soggy.

🐝 Bonus Tip: Add a Pollinator Twist

Plant summer bulbs alongside wildflowers or herbs like lavender, basil, or echinacea to attract bees, butterflies, and hummingbirds. Not only will your garden look stunning, but it’ll also be buzzing with life.

April is your moment to dream in color! With just a little digging now, you’ll have a garden bursting with summer beauty in a few short months. Get your bulbs in the ground, grab a glass of sweet tea, and start counting down the days to blooms!

Happy planting! 🌸🌿

Sage Advice: How to Grow and Care for Sage in Your Garden

If you’re dipping your toes into herb gardening, sage is one of the best herbs to start with. This beautiful, aromatic plant not only adds savory flavor to your dishes, but it also brings soft green-grey texture to your garden or containers. Whether you’re planting in the ground or in a pot on your porch, sage is a hardy herb that’s beginner-friendly and low-maintenance.

Let’s walk through everything you need to know—from seed to harvest!


🌱 How to Plant Sage Seeds

  1. When to Start:
    Start sage seeds indoors 6 to 8 weeks before your last expected frost. If you’re in a warm climate, you can also direct sow seeds outdoors after the danger of frost has passed.
  2. Supplies You’ll Need:
    • Seed starting tray or small pots
    • Seed-starting mix (light and well-draining)
    • Sage seeds
    • Spray bottle or gentle watering can
  3. Planting Steps:
    • Fill your tray or pots with seed-starting mix.
    • Place 2–3 sage seeds in each cell or pot, pressing them gently into the soil—about ¼ inch deep.
    • Mist with water to moisten the soil without washing the seeds away.
    • Cover lightly with plastic wrap or a humidity dome to help germination.
    • Place the tray in a warm spot with plenty of indirect sunlight (or under grow lights).
  4. Germination Time:
    Sage seeds can take 10–21 days to sprout, so be patient and keep the soil moist but not soggy.

🌿 Transplanting and Sage Plant Care

Once your seedlings are 2–3 inches tall and have a few sets of true leaves, they’re ready to move outdoors.

  1. Choosing the Right Spot:
    • Sage loves full sun, so choose a sunny area in your garden or a bright spot on your patio.
    • It prefers well-drained soil—consider raised beds or containers with good drainage.
  2. Transplanting Tips:
    • Space your sage plants about 18–24 inches apart.
    • Water well after transplanting to help the roots settle in.
  3. Watering & Care:
    • Sage doesn’t like wet feet! Water when the top inch of soil feels dry.
    • Once established, sage is drought-tolerant and doesn’t need much babying.
    • Trim leggy stems to encourage bushier growth.
  4. Fertilizer:
    Sage doesn’t need much fertilizer. In fact, too much can reduce its flavor. A compost-rich soil will usually do the trick.
  5. Pests & Problems:
    Sage is pretty pest-resistant, but keep an eye out for aphids or spider mites. A gentle spray of water or insecticidal soap can help if needed.

✂️ How to Harvest Sage

You can begin harvesting sage once your plant is well-established and about 6–8 inches tall.

  1. Best Time to Harvest:
    Morning, after the dew dries but before the sun gets too hot, is the best time to harvest for maximum flavor.
  2. How to Cut:
    • Snip a few leaves or cut stems just above a leaf node (where new leaves are growing).
    • Always leave at least two-thirds of the plant to keep it healthy.
  3. Drying & Storing:
    • Tie stems together and hang them upside down in a cool, dry spot with good air circulation.
    • Once dry, crumble the leaves and store them in an airtight jar away from sunlight.

Have you grown sage before, or are you just getting started? Let us know in the comments below and share your favorite way to use fresh sage in the kitchen!

Happy gardening!

Join Me for a Garden Chat – Live on Facebook This Sunday!

I’m so excited to announce that I’ll be going live on Facebook this Sunday at 3 PM Central Time for a fun and interactive garden chat! Whether you’re a seasoned plant lover or just starting your gardening journey, this live session will be packed with helpful tips, inspiration, and a chance to connect.

During the Facebook Live, I’ll be sharing:

Herb Gardening Basics – Easy-to-grow herbs for your kitchen especially pin pointing the herbs from my Culinary Herb Kit that is listed in my Etsy shop. I will share how to sow the seeds and plant care directions for the herbs. Plus I will talk about my course that goes into deeper details about each herb.

Mark your calendar and join me on my Facebook page this Sunday at 3 PM Central – I can’t wait to chat with you all! ( https://www.facebook.com/printhousedersign1.0)

Come See Me in Pecan Gap This Saturday! ( 9am- 4pm )

If you’re local, I’d love to see you in person! This Saturday, I’ll be selling at the Pecan Gap Fire Station alongside other amazing vendors. I’ll have a fresh selection of herbs, air plants, and succulents available – perfect for adding a touch of greenery to your home or gifting to a fellow plant lover.

It’s going to be a fantastic day filled with community spirit and unique finds. Swing by, say hello, and pick up some plants to brighten your space!

I can’t wait to connect with you both online and in person this weekend. See you soon!

Spring DIY: Create Charming Eggshell Succulent Planters

Embracing Succulents for Spring

Spring is all about renewal and growth, making it the perfect time to introduce succulents into your home or garden. Their vibrant greens, purples, and blues bring a refreshing touch to any space. You can create a beautiful spring display by arranging eggshell planters in a nest-like basket, placing them on a sunny windowsill, or using them as a centerpiece for a seasonal table setting. These tiny planters also make delightful Easter decorations or thoughtful gifts for plant lovers!

This DIY project is a perfect way to recycle eggshells and bring a bit of nature indoors. Have fun creating your own mini succulent garden!

he first day of spring is the perfect time to refresh your home with a touch of greenery. Succulents are a fantastic way to bring the fresh, vibrant energy of the season indoors. Their low-maintenance nature and variety of colors make them an excellent choice for springtime décor, and what better way to display them than in charming eggshell planters? Eggshell planters are an eco-friendly and adorable way to showcase tiny succulents while adding a touch of charm to your home or garden. Plus, they make for a fun DIY project that’s easy and rewarding!

What You’ll Need:

  • Empty eggshells (cleaned and dried)
  • Small succulents or succulent cuttings
  • Cactus or succulent soil mix
  • A small spoon or tweezers
  • A needle or small nail (for drainage holes, optional)
  • An egg carton or mini tray for displaying the planters

Step-by-Step Guide:

1. Prepare Your Eggshells

Gently crack the top of the eggshells and remove about a third of the shell. Empty the contents (save for cooking!) and carefully rinse the inside. Let the eggshells dry completely before using them as planters.

2. Create Drainage Holes (Optional)

Using a needle or a small nail, carefully poke a few tiny holes in the bottom of the eggshells. This helps prevent excess water from sitting at the bottom, reducing the risk of root rot. If you prefer not to poke holes, be mindful of watering lightly.

3. Add Soil

Spoon a small amount of cactus or succulent soil mix into each eggshell. Fill them about three-quarters full, leaving space for the plant’s roots.

4. Plant Your Succulents

Gently place your tiny succulents or succulent cuttings into the soil. If using cuttings, let them callous over for a day before planting to prevent rot. Use tweezers if needed to position them carefully. Once placed, add a little more soil around the base to secure the plant.

5. Water Lightly

Since eggshells are small and don’t have much drainage, use a small dropper or misting bottle to lightly water your succulents. Be careful not to overwater!

6. Display Your Eggshell Planters

Place your eggshell planters back into an egg carton, a small tray, or a decorative dish. They make a perfect windowsill or tabletop display, and you can even use them as charming party favors or gifts!

Care Tips:

  • Keep your succulent egg planters in a bright location with indirect sunlight.
  • Water sparingly, about once every two weeks or when the soil feels completely dry.
  • If your succulents outgrow their eggshell planters, transplant them into larger pots to continue thriving.

Why Use Eggshells?

Eggshells not only serve as a biodegradable planter but also contain calcium, which can benefit plants as they break down. When you’re ready to repot, simply crush the shell and plant the whole thing in soil!

3 Unique Air Plants and How to Care for Them

Air plants (Tillandsia) are some of the most fascinating houseplants you can grow. Unlike traditional plants, they don’t need soil to thrive—just air, water, and light. With over 600 species, each with its own unique characteristics, choosing the right air plant for your space can be exciting. Today, let’s dive into three standout varieties and how to care for each one.

1. Tillandsia xerographica: The Queen of Air Plants

Description: This stunning air plant is known for its silvery-green, thick, curling leaves that form a beautiful rosette. It’s slow-growing but can reach up to 12 inches in width, making it a statement piece in any collection.

Care Tips:

  • Light: Bright, indirect light or some direct morning sunlight. A south-facing window is ideal.
  • Water: Soak for 20–30 minutes once every 7–10 days. Shake off excess water to prevent rot. Mist occasionally in dry conditions.
  • Airflow: Needs good air circulation to dry properly after watering.
  • Temperature: Prefers warm temperatures (50–90°F) and thrives in humidity.

2. Tillandsia ionantha: The Blushing Beauty

Description: One of the most popular air plants, Tillandsia ionantha is small but mighty. It starts off green but blushes red or pink when about to bloom, producing a vibrant purple flower.

Care Tips:

  • Light: Prefers bright, indirect light but can handle some direct sun.
  • Water: Soak in water for 15–20 minutes once or twice a week, depending on humidity. Shake dry thoroughly.
  • Airflow: Needs good air movement—avoid placing it in enclosed containers without ventilation.
  • Temperature: Loves warm temperatures but can tolerate slight fluctuations.

3. Tillandsia bulbosa: The Alien-Looking Wonder

Description: With its wavy, tentacle-like leaves, Tillandsia bulbosa looks like something from another world. It’s unique in that it often forms a symbiotic relationship with small organisms like bacteria that help it absorb nutrients.

Care Tips:

  • Light: Medium to bright indirect light is best.
  • Water: Mist 3–4 times a week or soak for 15 minutes once a week. It holds water in its bulbous base, so make sure to shake out any trapped moisture.
  • Airflow: Needs excellent airflow to prevent rot inside its base.
  • Temperature: Enjoys warmth and humidity but should never sit in standing water.

Final Thoughts

Air plants are easy to care for, but each variety has its preferences. The key to keeping them healthy is providing the right balance of light, water, and airflow. Whether you’re drawn to the dramatic xerographica, the colorful ionantha, or the unusual bulbosa, there’s an air plant for every plant lover.

Which air plant is your favorite? Let me know in the comments!

Home is Where the Boat Is

Potting, Puttering & Pontooning

Cats and Trails and Garden Tales

Musings on cats, travel, gardens and life

Leaf And Twig

Where observation and imagination meet nature in poetry.

phillipsplace

A new beginning, mobile home living, adding our style inside and out.

Ruth E. Hendricks

Daily Journal of Life in Pittsburgh

The Haute Mommy Handbook

Motherhood Misadventures + Creative Living

Suzanne's Mom's Blog

Arts, Nature, Good Works, Luna & Stella Lockets & Birthstones

𝑻𝒐𝒓𝒏𝒂𝒅𝒐 𝑶𝒇 𝑪𝒉𝒂𝒐𝒔 🌪

Thoughts, experiences and learnings in a turbulent time

Sarah Rajkotwala - Author & Spiritual Teacher blog

Gardening Fairies Flowers Spirituality Angels Love Joy

Ideas and Advice for How To Live a Joyful and Empowered Life.

All Things Empowering - Healing Ourselves & Earth, Self-Sufficiency, Food Forests, Gardening, Art, Road Trips, Preserving, Foraging, Permaculture, Homesteading and More!

AmericaOnCoffee

We’re just inviting you to take a timeout into the rhythmic ambiance of our breakfast, brunch and/or coffee selections. We are happy whenever you stop by.

Heart to Hearth Cookery

Sharing my Experimental Archaeology of Food

The Herb Society of America Blog

Learn • Explore • Grow