
Have you fallen in love with those Pinterest pictures of elaborate wall hangings and boho chic macrame hanging planters? Luckily for you, macrame is a skill accessible to everyone and anyone!
What is Macrame?
It’s the art of knotting string or chord into decorative or useful items. There are lots of different knots to learn that will give you a different look and feel!Like any skill, macrame takes time, patience and of course practice! Once you get the hang of things you’ll be knotting up all sorts of cool and crazy pieces of art!
However, everyone has to start somewhere and so below are a couple easy projects.
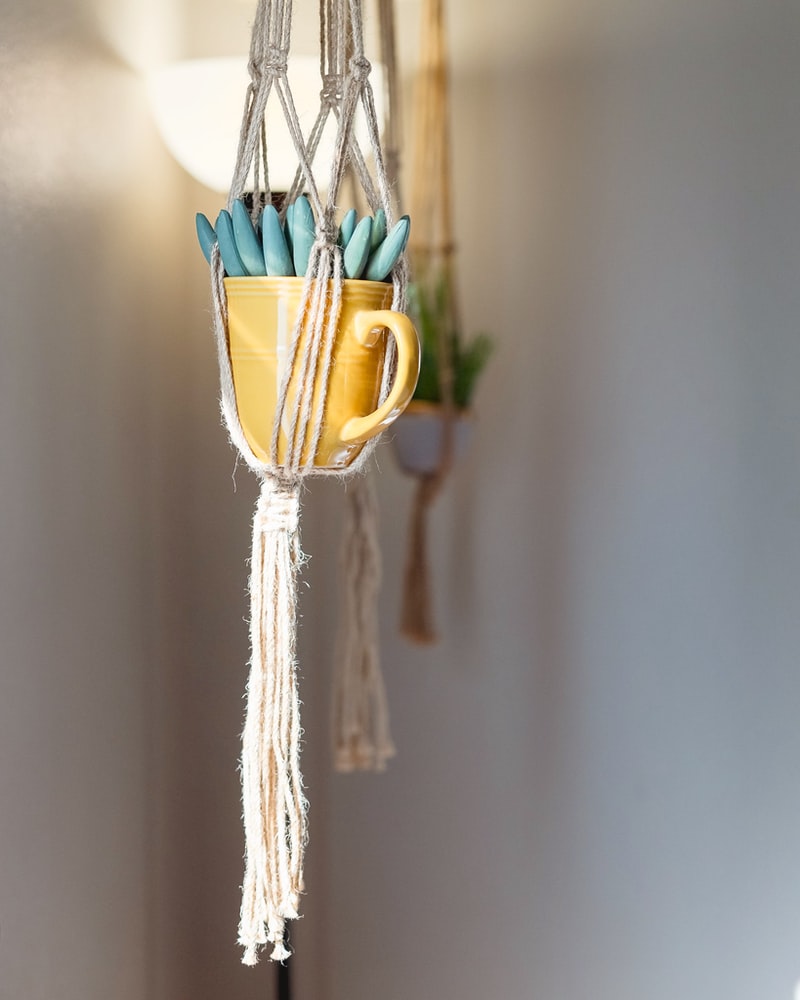
Making your first DIY macramé plant hanger is a project that may seem daunting at first, but once you’ve learned the basics, it’s actually quite easy! Today, we’ll show you how to make a macramé plant hanger using basic knots and patterns.
Here are the three types of basic knots we’ll be using in the tutorial:
- Square knot
- Half square knot or spiral knot
- Loop knot
Materials:
- 8 pieces of 15 foot long cotton cord (3.1mm thick)
- 2” brass ring
- 2 pieces of 5 foot rope
Macrame Hanger Tutorial you can watch the video here as well.
How to create a macramé plant hanger:
- Gather all 8 pieces of cord, fold in half and loop through the ring.
- Using your 5 foot long piece of string, tie a loop knot right below the ring.
- Take four strands and tie a square knot. Repeat 6 times.
- Repeat this pattern with the next group of 4 cords, and repeat for the remaining cords.
- Leave a 2 ½ inch gap and tie a half square knot.
- Repeat until you’ve created a 5 inch spiral.
- Repeat this pattern for the remaining knot groups.
- Leave a 6 inch gap and create a crossover square knot using the 2 right cords from your first group and the 2 left cords from the adjacent group.
- Repeat for the remaining knot groups.
- Leave 6 inch gap and create another crossover square knot by alternating the cords from the previous step.
- Leave a 3 ½ inch gap and tie a loop knot.
- Trim off excess cord to create a tassel finish.
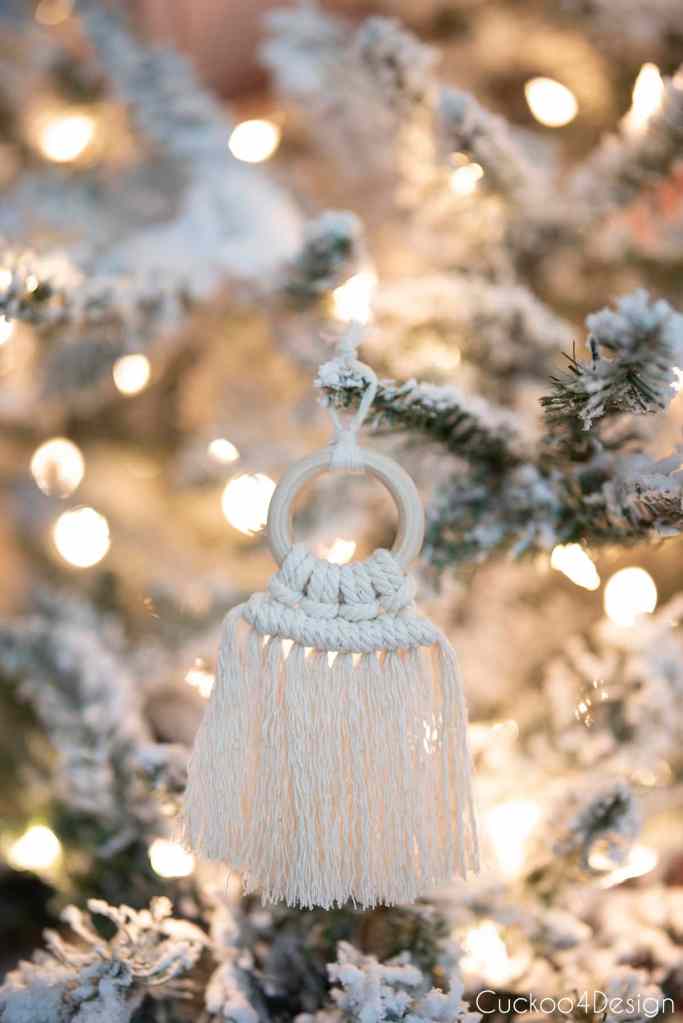
Ornaments with macrame yarn
Supplies needed to make macrame ornaments
- macrame yarn
- scissors
- wooden rings
- comb
- fabric stiffener (optional)
Start by cutting your yarn. I used 5 pieces of macrame yarn cut at 20 inches long and one small 6-inch piece for a short piece to hang the macrame ornament.
- Fold the 6-inch piece in half, knot it at the ends and loop it over a wooden ring with a Lark’s Head knot as pictured below.
- Then grab your 5 pieces of macrame yarn and put one to the side for later. Fold 4 pieces in half and also loop the on the wooden ring with Lark’s Head knots.
- Grab your 5th piece of macrame yarn and lip the yarn from the wooden ring around the 5th piece with horizontal Half Hitch knots as pictured. Usually, when making macrame you don’t add a new piece of yarn but use the outside string on each side. For this one, I wanted extra string though which is why I added an extra piece.
- Continue the Half Hitch knots to the other side of the little macrame hanging.
- Then all you have to do is unravel the yarn, comb everything, and trim the ends evenly. This is where you could use the fabric stiffener to stiffen the fringe but this time I didn’t do that.
https://cuckoo4design.com/how-to-make-christmas-ornaments-with-macrame-yarn/?jwsource=cl ( video to help with each step)
If you don’t have time to start a new project and still would love to have a little macramé item, you can find macramé keychains now available at www.printhousedesign.com

Aaahhh..this has been on my To-Do list for so long!
LikeLike