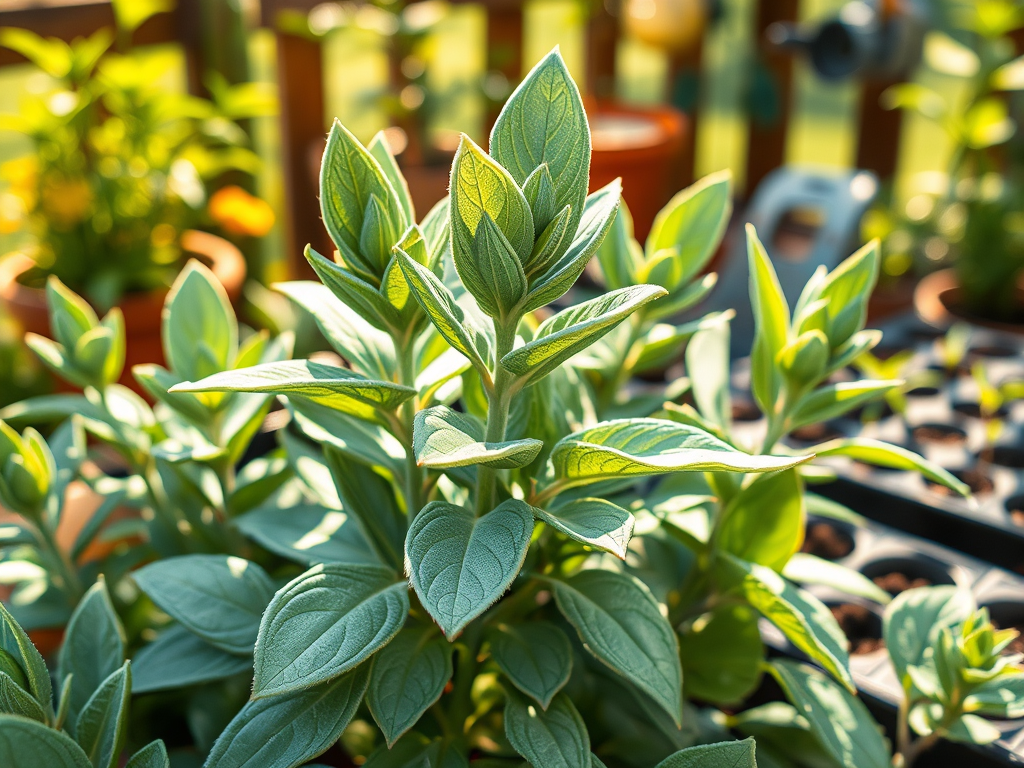
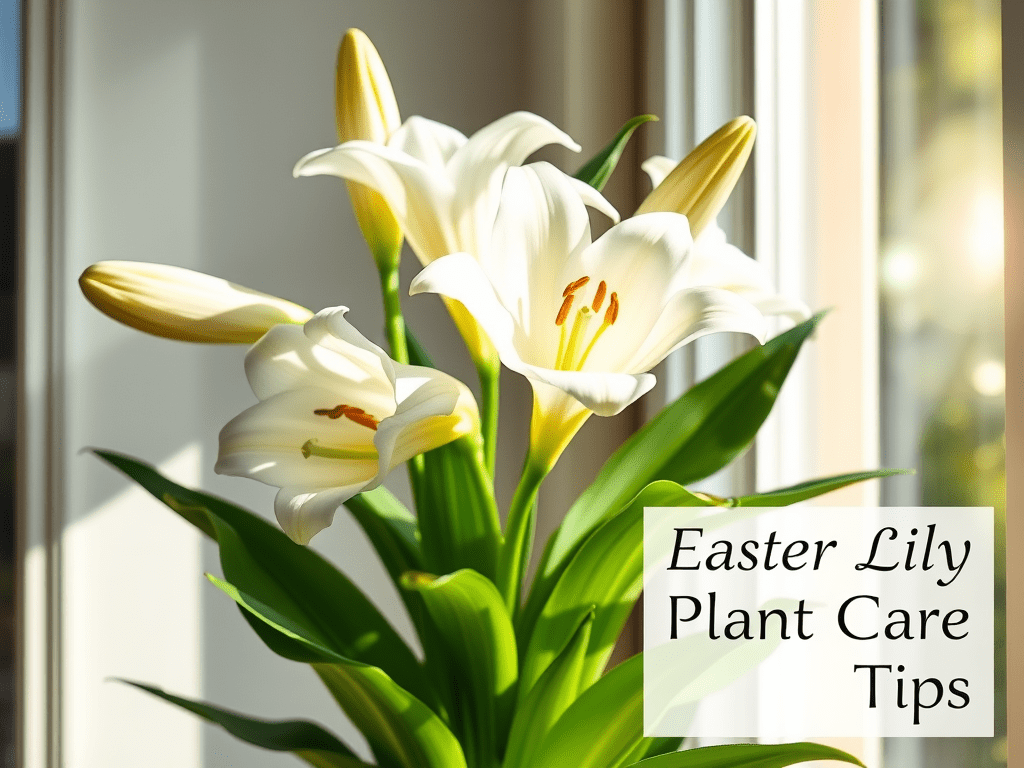
Grow Your Own Tomatoes: A Fun Gardening Project for Kids!

Gardening is a great way to bond with your kids while teaching them patience, responsibility, and a love for nature! One of the easiest and most rewarding plants to grow is the humble tomato. In this blog, we’ll share a simple way to grow tomatoes with your kids using a DIY plastic cup greenhouse and two easy planting methods. Let’s get started!

DIY Plastic Cup Greenhouse for Tomato Seeds

Creating a mini greenhouse using plastic cups is a fun way to help your kids understand how seeds grow while keeping the seeds warm and moist for faster germination.

Materials Needed:

  • 2 clear plastic cups (per plant)
  • A push pin or small nail (for drainage holes)
  • Potting soil
  • Tomato seeds (from a seed packet or a fresh tomato slice)
  • Water
  • A sunny windowsill

How to Make the Greenhouse:

  1. Prepare the Cups – Take one plastic cup and use a push pin or small nail to poke a few drainage holes in the bottom.
  2. Add Soil – Fill the cup about three-quarters full with potting soil.
  3. Plant the Seeds
    • If using store-bought seeds, place 2-3 seeds on top of the soil, then lightly cover them with about ¼ inch of soil.
    • If using a fresh tomato slice, cut a thin slice from a ripe tomato and place it directly on top of the soil, then cover it lightly with a thin layer of soil.
  4. Water Gently – Use a spray bottle or gently pour water over the soil to moisten it.
  5. Create the Greenhouse Effect – Place the second plastic cup upside down over the top to form a dome. This helps keep warmth and moisture inside for better germination.
  6. Set in a Sunny Spot – Put the greenhouse in a warm, sunny windowsill and watch the magic happen!

Caring for Your Growing Tomatoes

  • Check Daily – Kids will love checking their mini greenhouses each day! Keep the soil moist but not too wet.
  • Sprout Time – In about 7-14 days, little seedlings will start to appear.
  • Remove the Cover – Once the seedlings grow about an inch tall, remove the top cup and let them grow in the open air.
  • Transplant – After 4-6 weeks, when the plants are stronger, they can be moved to a bigger pot or directly into the garden.

Why This Project is Perfect for Kids

  • Hands-On Fun – Kids love digging in the soil and seeing plants grow from their efforts.
  • Easy Science Lesson – It’s a great way to teach kids about plant life cycles.
  • Encourages Healthy Eating – When kids grow their own food, they’re more likely to eat it!

Encourage your little gardeners to check on their plants daily, water when needed, and watch their tomato plants grow! Before you know it, they’ll be picking their own juicy tomatoes right from the vine. Happy planting!

The Culinary Kitchen Herb Seed Collection Has Arrived!

Exciting news, gardeners and food lovers! My Culinary Kitchen Herb Seed Collection has officially arrived at my shop as of yesterday, and I couldn’t be more thrilled to share it with you. Whether you’re a seasoned gardener or just starting out, this collection is perfect for growing fresh, flavorful herbs right in your own kitchen, patio, or garden bed.

What’s Inside the Collection?

This special seed collection includes eight essential culinary herbs, carefully selected to elevate your home cooking with vibrant flavors and aromas:

🌱 Basil – A classic favorite for pesto, pasta, and fresh salads.
🌱 Chives – Perfect for adding a mild onion flavor to soups, eggs, and baked potatoes.
🌱 Cilantro – A staple in Mexican and Asian cuisine, great for salsas and curries.
🌱 Dill – Adds a fresh, tangy taste to pickles, seafood, and dips.
🌱 Oregano – A must-have for Italian dishes, pizzas, and roasted vegetables.
🌱 Parsley – A versatile garnish that’s packed with nutrients and flavor.
🌱 Rosemary – Infuses depth into roasted meats, potatoes, and homemade bread.
🌱 Thyme – A fragrant herb that enhances soups, stews, and poultry dishes.

All seeds are high-quality, non-GMO, and easy to grow, making them perfect for home gardeners of all levels.

Join Me for a Live Gardening Session!

To help you get started, I’ll be going LIVE on my Printhousedesign1.0 Facebook page in March to talk about this collection and share my best tips for sowing and growing these herbs successfully. This will be a great opportunity to learn, ask questions, and get inspired to start your own herb garden!

Get Your Seed Collection Today!

Ready to grow your own fresh culinary herbs? You can grab your Culinary Kitchen Herb Seed Collection now in my Etsy shop:
👉 Shop here

I can’t wait to see what you grow! Stay tuned for more gardening tips, and be sure to follow me on Facebook so you don’t miss my live session in March. Happy planting! 🌿✨ ( https://www.facebook.com/printhousedesign1.0

Motivational Monday: Grow Beyond Your Comfort Zone

Have you ever noticed how a plant’s environment affects its growth? A plant that thrives in one space might struggle in another. Too much shade, and it won’t get the light it needs. Too much water, and the roots drown. The right balance of nutrients, fresh air, and space to stretch its roots is what helps it flourish.

But here’s something interesting—when a plant stays in the same pot for too long, it becomes root-bound. The roots twist and turn, searching for more space, but there’s nowhere to go. Growth slows. The plant might survive, but it won’t thrive.

Now, think about yourself. How often do we stay in the same routines, the same places, the same situations—comfortable, yet limited? We resist change because it’s unfamiliar. But just like a plant needs to be repotted into fresh soil to grow stronger, we, too, need new experiences, challenges, and environments to truly thrive.

Maybe it’s time to step outside your usual space—start a new project, meet new people, take on a challenge that scares you. It might feel uncomfortable at first, but that’s how you grow strong, just like a plant stretching toward the sun.

This week, ask yourself: Am I just surviving, or am I thriving? If you feel stuck, maybe it’s time to change your environment and give yourself the space to grow. 🌿✨

Happy Monday—go out and grow!

Seed Starter Tubes for Zinnias & Sunflowers

Making seed starter tubes with paper towel or toilet paper rolls is an easy and eco-friendly way to start seeds. Here’s how you can do it:

Materials Needed:

  • Empty toilet paper or paper towel rolls
  • Scissors
  • A tray or shallow container
  • Potting soil
  • Seeds
  • Water

Instructions:

  1. Cut the Rolls:
    • If using paper towel rolls, cut them into smaller sections about 3-4 inches tall. Toilet paper rolls are already the right height.
  2. Create a Base:
    • Make 4 small cuts (about ½ inch long) around one end of each roll.
    • Fold the flaps inward to form a bottom to help hold soil. You can also leave them open and place them in a tray to prevent soil from spilling out.
  3. Fill with Soil:
    • Place the tubes upright in a shallow tray and fill each with moist potting soil, leaving about ½ inch of space at the top.
  4. Plant the Seeds:
    • Choose your seeds and plant them according to their depth requirements (usually about 2-3 times the seed’s size in depth).
  5. Water Gently:
    • Lightly water the soil to keep it damp but not soggy.
  6. Provide Light & Warmth:
    • Place your tray in a warm, well-lit area or under grow lights.
  7. Transplanting:
    • Once the seedlings are strong enough, you can plant the entire tube directly into the garden. The cardboard will break down naturally in the soil.
    • How to Sow Zinnia and Sunflower Seeds in Toilet Paper Roll Tubes
    • Zinnias:
    • When to Sow Indoors: 4-6 weeks before the last frost date
    • When to Transplant: After the last frost when the soil is warm
    • How to Plant in Tubes:
      1. Fill the tube with moist potting soil, leaving ½ inch of space at the top.
      2. Make a small hole (¼ inch deep) in the center of the soil.
      3. Drop in one zinnia seed and cover lightly with soil.
      4. Water gently and keep the soil damp but not soggy.
      5. Place in a warm, sunny spot (or under grow lights).
      6. Once seedlings have two sets of true leaves and outdoor temperatures are consistently warm, plant the entire tube in your garden.
    • Sunflowers:
    • When to Sow Indoors: 2-4 weeks before the last frost
    • When to Transplant: After the danger of frost has passed
    • How to Plant in Tubes:
      1. Fill the tube with moist potting soil, leaving ½ inch of space at the top.
      2. Make a hole about ½ inch deep in the center of the soil.
      3. Drop in one sunflower seed and cover lightly with soil.
      4. Water gently and place the tube in a warm, sunny location.
      5. Once the seedling is about 3-4 inches tall, harden it off and transplant the whole tube directly into the ground.
    • Both zinnias and sunflowers prefer full sun and well-draining soil, so make sure to choose a bright spot in your garden for transplanting! 🌿🌸🌻

Spring Potpourri

How to Create a Fresh Spring Potpourri with Dehydrated Lemons, Lavender, and Herbs

Spring is in the air, and what better way to bring that fresh, uplifting scent into your home than with homemade potpourri? A blend of dehydrated lemons, lavender, and aromatic herbs not only fills your space with a natural fragrance but also adds a beautiful, decorative touch. Follow this guide to learn how to dehydrate lemons, select complementary herbs, and create a simmering potpourri that will make your home smell like a spring garden.

Ingredients for Spring Potpourri

  • 2-3 lemons, thinly sliced
  • 1/2 cup dried lavender buds
  • 1/2 cup dried rosemary or thyme
  • 1/2 cup dried rose petals or chamomile flowers
  • Optional: cinnamon sticks or star anise for added depth

How to Dehydrate Lemons

Dehydrated lemons bring a fresh, citrusy note to your potpourri. You can dry them using an oven or a dehydrator.

Oven Method:

  1. Preheat your oven to 170°F (or the lowest setting).
  2. Slice lemons thinly, about 1/8-inch thick.
  3. Lay the slices in a single layer on a baking sheet lined with parchment paper.
  4. Bake for 3-4 hours, flipping halfway through, until completely dried.
  5. Let them cool before using.

Dehydrator Method:

  1. Arrange lemon slices in a single layer on dehydrator trays.
  2. Set the dehydrator to 135°F and dry for 6-8 hours or until crisp.
  3. Store in an airtight container until ready to use.

How to Dry Herbs and Flowers

If you have fresh herbs or flowers, drying them is easy and enhances their fragrance.

Air-Drying:

  1. Tie herbs into small bundles and hang them upside down in a warm, dry area for 1-2 weeks.
  2. For flowers, spread petals on a mesh screen and let them dry for a few days.

Oven-Drying:

  1. Preheat oven to 180°F.
  2. Spread herbs or petals in a single layer on a baking sheet.
  3. Bake for 1-2 hours, checking frequently to prevent burning.

Assembling Your Potpourri

Once all ingredients are dried, mix them together in a bowl or jar. Store in an airtight container for up to six months.

How to Simmer Potpourri for a Fresh Spring Scent

A simmering potpourri is a natural way to fill your home with fragrance.

  1. Fill a small pot with 2-3 cups of water.
  2. Add a handful of your dried potpourri blend.
  3. Simmer on low heat, adding more water as needed.
  4. Enjoy the refreshing scent of spring throughout your home!

This homemade spring potpourri makes a lovely addition to your kitchen and a wonderful gift for fellow plant lovers. Happy crafting!

Home is Where the Boat Is

Potting, Puttering & Pontooning

Cats and Trails and Garden Tales

Musings on cats, travel, gardens and life

Leaf And Twig

Where observation and imagination meet nature in poetry.

phillipsplace

A new beginning, mobile home living, adding our style inside and out.

Ruth E. Hendricks

Daily Journal of Life in Pittsburgh

The Haute Mommy Handbook

Motherhood Misadventures + Creative Living

Suzanne's Mom's Blog

Arts, Nature, Good Works, Luna & Stella Lockets & Birthstones

𝑻𝒐𝒓𝒏𝒂𝒅𝒐 𝑶𝒇 𝑪𝒉𝒂𝒐𝒔 🌪

Thoughts, experiences and learnings in a turbulent time

Sarah Rajkotwala - Author & Spiritual Teacher blog

Gardening Fairies Flowers Spirituality Angels Love Joy

Ideas and Advice for How To Live a Joyful and Empowered Life.

All Things Empowering - Healing Ourselves & Earth, Self-Sufficiency, Food Forests, Gardening, Art, Road Trips, Preserving, Foraging, Permaculture, Homesteading and More!

AmericaOnCoffee

We’re just inviting you to take a timeout into the rhythmic ambiance of our breakfast, brunch and/or coffee selections. We are happy whenever you stop by.

Heart to Hearth Cookery

Sharing my Experimental Archaeology of Food

The Herb Society of America Blog

Learn • Explore • Grow