
Maximalist

A maximalist is a person who embraces an excessive, opulent style and applies it to their home decor. The maximalist aesthetic is characterized by an abundance of patterns, textures, colors, and ornamentation.

So how to  decorate your home as a maximalist, consider the following tips:

  1. Embrace bold colors: Use a wide range of bright and bold colors, and don’t be afraid to mix and match.
  2. Mix and match patterns: Combine different patterns, such as florals, stripes, and geometrics, in the same room for a bold look.
  3. Layer textures: Use different textures, such as velvet, silk, and fur, to add depth and interest to your spaces.
  4. Add statement pieces: Invest in eye-catching furniture, lighting fixtures, and accessories, such as chandeliers, ornate mirrors, and statement artwork.
  5. Don’t be afraid of clutter: A maximalist home is not afraid of clutter and displays a collection of eclectic items, such as books, vases, and collectibles.

Remember, the key to maximalist decor is to have fun and not be afraid to make a statement. If you are like me and love plants & your style is a maximalist you can take these tips to design with house plants

Choose plants that fit your light conditions: Make sure you choose plants that are well-suited for the amount of light available in the room.

Group plants together: Grouping plants together can create a lush, tropical feel and add visual interest to a space.

Consider height: Mixing up the height of plants adds dimension to a room, creating visual interest and depth.

Use plants to divide spaces: Large, tall plants can be used as room dividers to add greenery and create separate spaces within a room.

Hang plants: Hanging plants is a great way to add greenery to a space while freeing up floor space. Choose pots and containers that complement your décor: Consider the size, shape, and color of pots when selecting containers for your plants.

You can find fun decorative pieces and planters for your home or office at thrift shops, estate sales, and unique décor on Etsy. Our shop focuses on unique animal planters that can be the social spot light in your space.
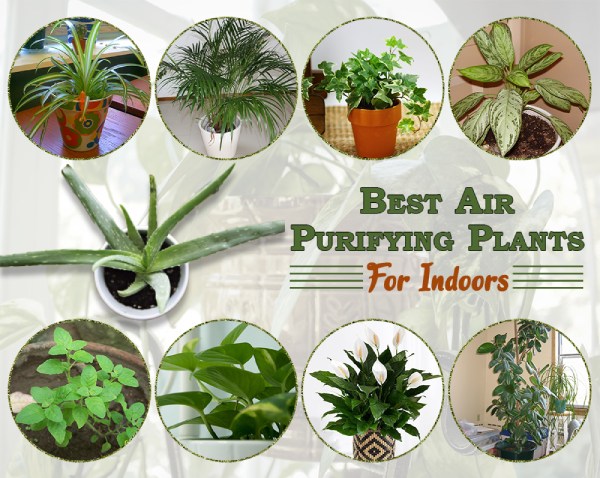
Air- Purifying Plants

Adding air-purifying plants to your home can have numerous benefits. These plants not only add beauty and life to your living space, but they also help to improve the air quality by removing harmful pollutants and chemicals. This results in a cleaner, healthier, and more inviting environment. Not only are these plants easy to care for, they can also be a natural and affordable way to promote wellness in your home. Whether you have a green thumb or not, incorporating air-purifying plants into your home décor is a simple and effective way to create a healthier living space. Below is a list of 4 easy houseplants to add to your space and help clear the air.

  1. Spider Plant (Chlorophytum comosum): Known for its ability to remove formaldehyde and xylene from the air, the spider plant is one of the easiest to care for. It thrives in bright, indirect light and only needs watering once the soil has completely dried out.
  2. Peace Lily (Spathiphyllum): This beautiful plant is effective at removing benzene, formaldehyde, trichloroethylene, and ammonia from the air. Peace lilies are low maintenance, preferring moist soil and partial shade.
  3. Aloe Vera: Not only does aloe vera provide a soothing gel for minor cuts and burns, it is also effective at removing formaldehyde from the air. This succulent requires bright, indirect light and infrequent watering.
  4. Snake Plant (Sansevieria trifasciata): Often called the “Mother-in-Law’s Tongue”, the snake plant is known for its ability to remove nitrogen oxides, formaldehyde, and benzene from the air. It is a hardy plant that can tolerate low light and infrequent watering, making it ideal for those with a busy schedule.

Next time you are looking to add a plant for your indoor space try adding one from the list above.

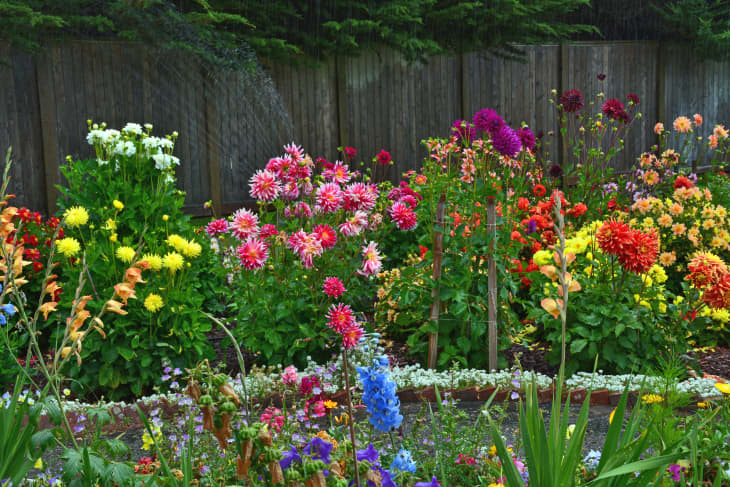
Create color in your garden

Spring is the perfect time to add some life to your front yard with a beautiful garden bed. Here are a few inspiring ideas to get you started:

  1. Welcome the Season with Color: Choose brightly colored spring flowers such as tulips, daffodils, crocuses, and hyacinths to create a cheerful and inviting garden bed.
  2. Create a Mixed Border: Plant a variety of perennials, shrubs, and bulbs in a naturalistic style for a charming and low-maintenance garden bed.
  3. Embrace Textures: Combine plants with different textures, such as fine-leaved ferns and the broad leaves of hostas, for a rich and dynamic garden bed.
  4. Use Edibles: Consider adding a vegetable or herb garden to your front yard. A raised bed filled with tasty edibles like lettuce, radishes, and herbs is both functional and beautiful.
  5. Play with Height: Use plants of varying heights, from short ground covers to tall grasses, to add depth and interest to your garden bed.
  6. Go Wild: Create a wildflower garden filled with native species that will attract pollinators and provide food and shelter for birds.

No matter which direction you choose, remember to have fun and be creative! Your front yard is an extension of your home, and a beautiful garden bed is a great way to make a statement and add value to your property.

Air Plant Care

An air plant, also known as Tillandsia, is a type of plant that grows without soil. Instead, they derive their nutrients from the air, moisture, and debris in their surroundings. Air plants have specialized scales on their leaves called trichomes that absorb water and nutrients from the air. They come in a variety of shapes, sizes, and colors, and can be grown in a range of environments, including on trees, rocks, or in containers. They are low-maintenance and make great indoor plants, as they do not require soil and only need occasional watering. There can be different methods to watering an air plant to keep it healthy and flourishing after you bring it home from the garden shop.

Soak method: Soak your air plants in a bowl of water for 15-20 minutes once a week. 

Mist method: Mist your air plants with water 1-2 times a week.

Drip method: Place your air plants in a tray of water and let them absorb moisture through the bottom for about 30 minutes.

Also ensure good drainage: Remove excess water from the base of the plant after watering to prevent root rot. Consider the environment: The frequency of watering will vary depending on the environment, such as temperature and humidity levels.

It is best to use rainwater or distilled water: Tap water can contain minerals that can build up in the leaves of the air plant over time.Fertilize occasionally: Air plants can benefit from a light application of fertilizer, especially during the growing season.

Using these tips and a little knowledge about air plants can help you along the way to a successful plant.

You can find live air plants at your local garden shop or at our Etsy shop: http://www.printhousedesign.com

How to build Raised garden bed

Its almost time to think about creating a garden. One type of garden you can create is a raised garden bed. It can be used to grow a wide variety of plants, as they provide good drainage and control over soil quality. Some plants that tend to do well in raised beds include:

  • Vegetables: tomatoes, peppers, cucumbers, eggplants, leafy greens, and root vegetables such as carrots and radishes.
  • Herbs: basil, thyme, rosemary, and chives.
  • Flowers: sunflowers, zinnias, marigolds, and daisies. It is important to note that the best plants for your specific raised bed will depend on factors such as the size of the bed, the amount of sunlight it receives, and the specific climate you live in. In general, it’s a good idea to choose plants that are well-suited to the growing conditions in your area. Building a raised garden bed is a simple and effective way to grow a variety of plants, vegetables, and herbs. Here are the basic steps to build a raised garden bed:
  • Choose a location: Select a spot in your yard that gets plenty of sunlight and has good drainage.
  • Measure and mark the area: Measure out the area where you want to build the raised bed and mark the perimeter with stakes and string.
  • Prepare the soil: Remove any weeds or grass from the area and loosen the soil with a spade or garden fork.
  • Build the frame: You can use a variety of materials to build the frame, such as wood, stone, or brick. If using wood, make sure to use rot-resistant lumber, such as cedar or redwood.
  • Fill the bed with soil: Once the frame is in place, fill the bed with a mixture of topsoil, compost, and any other soil amendments you may need, such as peat moss or perlite.
  • Plant your plants: Once the bed is filled with soil, you can start planting your plants, seeds, or seedlings.
  • Water and maintain: Water the plants regularly and add compost or other soil amendments as needed to keep the soil healthy and nourished.
  • That’s it! With these basic steps, you can build a raised garden bed and start growing your own plants, vegetables, and herbs.
Coding Interface

Forging Better Test Frameworks

Home is Where the Boat Is

Potting, Puttering & Pontooning

Cats and Trails and Garden Tales

Cats, travel, gardens and life in the Pacific Northwest

Leaf And Twig

Where observation and imagination meet nature in poetry.

phillipsplace

A new beginning, mobile home living, adding our style inside and out.

Ruth E. Hendricks

Daily Journal of Life in Pittsburgh

The Haute Mommy Handbook

Motherhood Misadventures + Creative Living

Suzanne's Mom's Blog

Arts, Nature, Good Works, Luna & Stella Lockets & Birthstones

𝑻𝒐𝒓𝒏𝒂𝒅𝒐 𝑶𝒇 𝑪𝒉𝒂𝒐𝒔 🌪

Thoughts, experiences and learnings in a turbulent time

Sarah Rajkotwala - Author & Spiritual Teacher blog

Gardening Fairies Flowers Spirituality Angels Love Joy

Ideas and Advice for How To Live a Joyful and Empowered Life.

All Things Empowering - Healing Ourselves & Earth, Self-Sufficiency, Food Forests, Gardening, Art, Road Trips, Preserving, Foraging, Permaculture, Homesteading and More!

America On Coffee

We’re just inviting you to take a timeout into the rhythmic ambiance of our breakfast, brunch and/or coffee selections. Enjoy!

Heart to Hearth Cookery

Sharing my Experimental Archaeology of Food