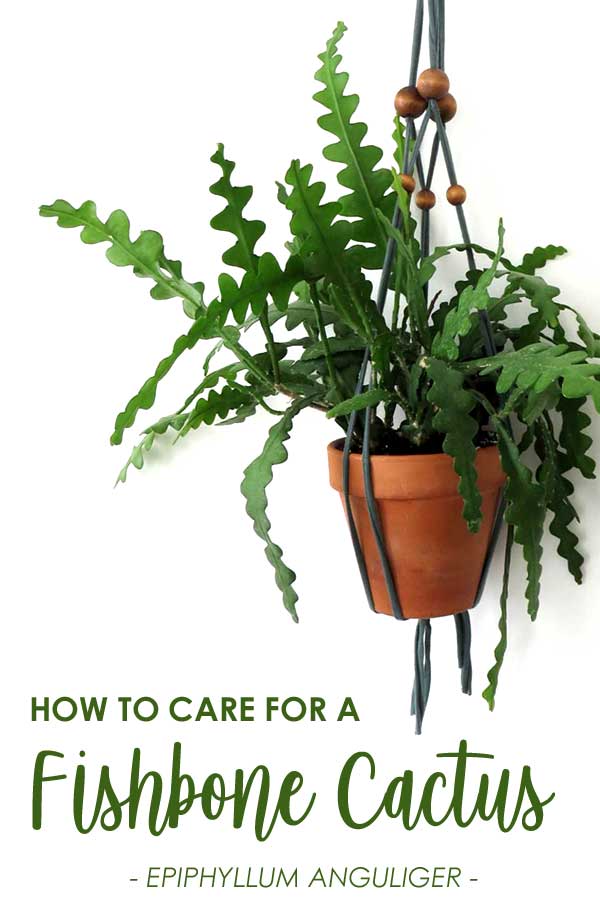
Fishbone Cactus Care

Fishbone cacti are quite easy to take care of and reward you with fast growth. They are also super easy to propagate making them a great gift for friends and family. Below you will find all the information you need to care for your plant.

Light source: Fishbone Cacti adapt well to a mix of light levels and can easily thrive in bright, indirect sunshine as well as medium light too. Their flat leaves mean they have adapted to soak in as much sunlight as possible so are a great choice for most plant parents. They can deal with some direct sunshine but burn easily so be cautious. If they get the right level of sunlight over the year, your Fishbone Cactus will reward you by flowering so it is definitely worth keeping an eye on those light levels.

Watering: Fishbone Cacti are native to more tropical climates, rather than the desert so it is best to water it slightly more than your other cacti types. Make sure their soil is able to dry out between waterings as Fishbone Cactus plants don’t like to be sat in water too much. Adjust your watering schedule throughout the year so that the potting mix isn’t too soggy during autumn and winter.

High humidity:  Fishbone Cacti thrive in humid environments so are best placed in the bathroom or kitchen where humidity levels are naturally higher due to showering and cooking. Misting, using pebble trays or buying a humidifier are the easiest ways for you to increase the humidity for your Cactus.

 Repotting: Every year or so, it may be time to repot your Fishbone Cactus as it can become unstable and stressed if root bound for too long. Make sure to handle the plant carefully when repotting to avoid any damage to the root system or leaves. Check to see if the roots are popping out from the top or bottom of the pot as this is a telltale sign that you need to repot your plant.

Safe for pets: Another great thing about Fishbone Cacti is that they are completely non-toxic for dogs and cats so you don’t need to worry about it being near your beloved furry friends. Although they don’t have super sharp spikes like a lot of other cacti, Fishbone Cacti do have small spines that can cause irritation so wear gloves when handling. 

We will post next week about propagating this beautiful cactus!

Pruning & Care for Air plants

Like any other plant, air plants also need pruning for appropriate maintenance. It helps them to get rid of brown and dead leaves that hamper healthy growth. Air plants are generally known for being low maintenance and easy plants to care for. With a little trimming and pruning, you can help them maintain their beauty.

Pruning Roots-Air Plants do have tiny roots that seek to anchor themselves for support. These can be trimmed away without causing the plant any harm. 

Shedding leaves- Air plants produce new leaves from their center, so its normal for the older outer leaves to gradually dry out and drop off. You can actually remove any dry leaves by gently pulling them downwards, but if you can completely remove it, that means the leaf is still healthy and needs to be left alone. If your air plant is shedding lots of leaves, it is likely due to unsuitable light, temp, or humidity. 

Curling leaves- This is a typical sign of dehydration and indicates that you  need to water your plant more frequently.

Soft brown areas & rotting- If you find your air plant suddenly turning brown at the base and the leaves are falling apart, it could be a build up of water that has led to rot. Sadly, there is nothing you can do to save it at this stage. For future plants, remember to make sure after watering that you place your plant upside down to dry ( if you soak your plant). 

These are a few tips to help keep your air plant flourishing. You can read more about watering and taking care of air plants in several earlier blog posts in our garden blog. 

If you have any questions about your plant- leave a question in the comment box.

Talk about it Tuesday: Indoor Composting

This Tuesday and for the next Tuesdays in the month of October I will be posting only a topic and I would love for my followers and viewers to comment in the comment box a question that would be related to the topic. Each week the topic will change and I will be collecting all the questions to answer them in a podcast that will be aired in November or December.

This Tuesday Topic is all about getting dirty in the kitchen… Indoor Composting 

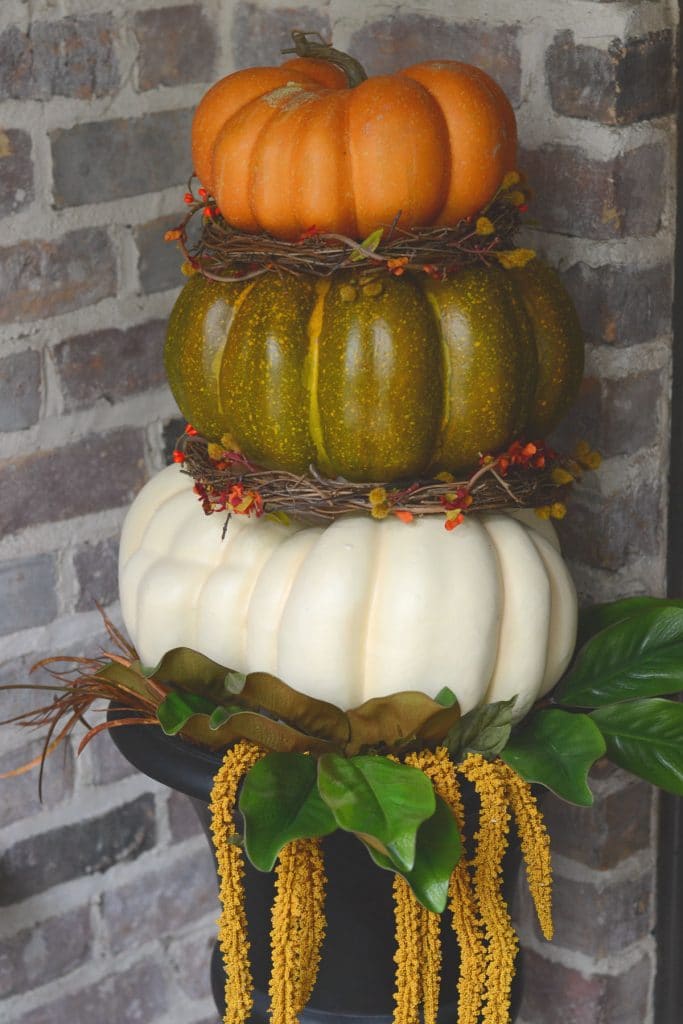
Pumpkin Topiary

It’s not too late to make a last minute pumpkin project for your porch or for the centerpiece of your halloween party. Fall pumpkin topiary can be an easy decor to  incorporate the fall colors with a variety of pumpkins, dried flowers and garlands. Faux foam pumpkins come in all shapes, sizes and colors and if you don’t see the one you like, you can always create your own with paint colors that are your favorite.  

What you need to start your DIY Project:

Pumpkin Topiary Supplies:

  • 3 or 5 foam pumpkins (in graduated sizes)
  • Spanish Moss or other filler
  • Berry Garland 
  • Dowel Rod
  • Urn or pot
  • Glue Gun
  • Floral Foam
  • Drill and Drill bit

Pumpkin Topiary Instructions:

Step 1) Cut a piece of floral foam to fit in the bottom of the urn.

Step 2) Using a hot glue gun, spread glue all along the bottom of the foam block and press it to the bottom of the urn.

Step 3) Stick dowel rod into the foam block.

Step 4) Using a drill and large drill bit, drill holes in the bottom and top center of the pumpkins for the dowel rod to slide in.  NOTE: Do not drill a hole in the top of the top pumpkin. You wan’t to leave the stem on this one.

Step 5) Place spanish moss or filler on the lip of the urn (no need to glue it down…the pumpkin will hold it in place). Especially if you want to use the urn for something else next spring; just pull the dowel out with the pumpkins and store to put back together next year.

Step 6) Slide the largest pumpkin on the dowel rod first and rest it on the moss.

Step 7) Place some moss and garland on top of the first pumpkin and then slide the next pumpkin on to hold the moss in place.

Step 8) Repeat with the next pumpkin until you are on your last pumpkin.

Step 9) Hot glue moss and garland to place them where you want them if needed.

Now that your little pumpkin project is complete you can show it off on the porch or inside on a table!

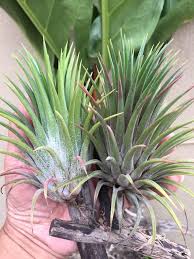
Tillandsia ionantha: Air Plant

The Tillandsia Ionantha is originally native to Mexico, Costa Rica, and certain areas of South America.One of the most desirable aspects of the Ionantha air plant is that it is a very hearty plant that will require minimal attention compared to some other varieties of air plants.  While they are a hearty plant, they still do require some attention with regular misting and soakings. 

 The Ionantha varieties love sunlight, so they should also be kept in an area that gets adequate light throughout the day(east/west facing windows are best).  We recommend soaking the plant once or twice a week depending on the environment. It likes warmer, humid conditions but will do just fine in a dryer environment with regular misting. Below are a few questionable questions about this beautiful plant that will help you keep your plant healthy and flourishing.

How do you care for an Ionantha plant?

The Ionantha varieties love sunlight, so they should also be kept in an area that gets adequate light throughout the day(east/west facing windows are best). We recommend soaking the plant once or twice a week depending on the environment, and regular misting as needed.

How big does Tillandsia Ionantha get?

Each Ionantha Tillandsia air plant will range from 2 to 3.5 inches in size. The plants you will receive will most likely arrive with green colored leaves, but these leaves will transition into gorgeous pink and purple colors before blooming into a flower.

How long does Tillandsia Ionantha live?

Life Cycle. Tillandsias are tropical plants that usually live for several years and will bloom and produce flowers only one time during their lifetime. The flowers are striking and brilliantly colored, and the bloom period will last several days to many months, depending on the species.

How do I know if my air plant needs water?

Signs of under-watering your air plant include the leaf tips turning brown or crispy. The natural concave shape of air plant leaves tends to become more exaggerated when under-watered. Unfortunately, if your air plant has been overwatered, it’s often too late to save it.

How fast do ionantha air plants grow?

The quick answer is, Air Plants are slow to grow, and will only bloom once in their life-span! This can take between a year and two years. Today we’ll take a closer look at Air Plant growth and blossoming.

You can read more about air plants in our previous blog post to learn more!

In our Etsy shop: Printhousedesign1 you can purchase these beautiful plants in their own listing or along with a planter. 

Follow the link to see them at our shop: https://www.etsy.com/listing/834531119/small-tillandsia-air-plants-for-indoor

Coding Interface

Forging Better Test Frameworks

Home is Where the Boat Is

Potting, Puttering & Pontooning

Cats and Trails and Garden Tales

Cats, travel, gardens and life in the Pacific Northwest

Leaf And Twig

Where observation and imagination meet nature in poetry.

phillipsplace

A new beginning, mobile home living, adding our style inside and out.

Ruth E. Hendricks

Daily Journal of Life in Pittsburgh

The Haute Mommy Handbook

Motherhood Misadventures + Creative Living

Suzanne's Mom's Blog

Arts, Nature, Good Works, Luna & Stella Lockets & Birthstones

𝑻𝒐𝒓𝒏𝒂𝒅𝒐 𝑶𝒇 𝑪𝒉𝒂𝒐𝒔 🌪

Thoughts, experiences and learnings in a turbulent time

Sarah Rajkotwala - Author & Spiritual Teacher blog

Gardening Fairies Flowers Spirituality Angels Love Joy

Ideas and Advice for How To Live a Joyful and Empowered Life.

All Things Empowering - Healing Ourselves & Earth, Self-Sufficiency, Food Forests, Gardening, Art, Road Trips, Preserving, Foraging, Permaculture, Homesteading and More!

America On Coffee

We’re just inviting you to take a timeout into the rhythmic ambiance of our breakfast, brunch and/or coffee selections. Enjoy!

Heart to Hearth Cookery

Sharing my Experimental Archaeology of Food