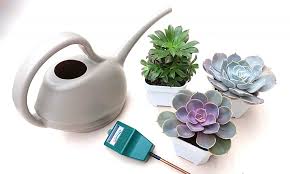
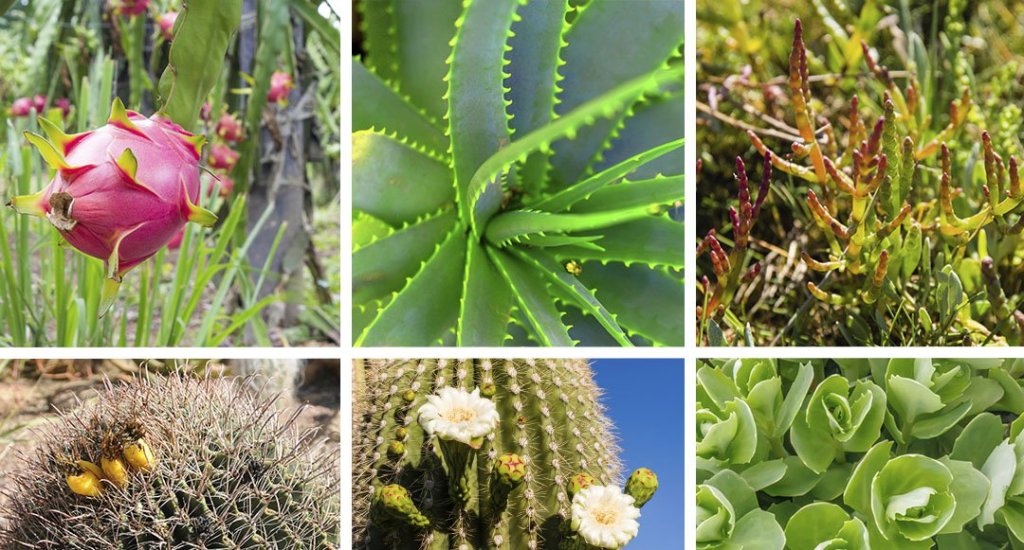
Succulents store extra water in their leaves, stems, or roots, which gives them the ability to survive a while between waterings (sometimes a month or more). Because they have a reputation for being drought-tolerant and growing in dryer climates many people don’t realize that when you bring them into your home or garden, they still need to be watered regularly. In order to keep your succulents thriving it’s not a good idea to force them to go without water for weeks or months at a time.
Giving these water-thrifty plants little splashes of water here and there won’t work, give them a good soaking until water runs out the drainage holes at the bottom of the pot. Be sure to empty the extra moisture from the saucer beneath the plant pot; too much wetness will rot the roots. Then let the soil dry out completely before watering again. Check the soil a week after watering; if it still feels moist, wait another week.
Watering succulents outdoors …. Summer is a good time to move your potted succulents outdoors. Though they love sun, give them a chance to acclimate to outdoor conditions by placing them in a partially shaded area before moving to a sunnier location. Keep them out of morning sunlight and late afternoon intense sun. Outdoor plants generally need more water than indoor plants. Again, your conditions will dictate how often succulents will need water. Start by checking on a weekly basis, paying attention to the condition of the potting soil and whether it’s bone dry or still has some moisture. Succulents (and cacti) grown in shallow containers may need water every few days.
These little watering tips should help you with your favorite succulent.
Gardening Hacks can be a great way to help you along your planting and taking care of your veggies and flower garden this season. Below I have listed eight different and useful garden hacks for this gardening season.
Coffee grounds are an excellent addition to your gardening routine. You can use them indirectly in your compost, fertilizer, or mulch. Plus, they are a wonderful deterrent to add around your garden edge to keep critters away from your plants. This is one of the best garden hacks that is practically free!
This hack is something I love! Add coffee filters into the bottom of your planters before adding soil. They allow water to soak through, but keep the soil in the pot rather than falling out through the holes. This saves your outdoor space and is ideal for keeping mud out of your house if you have indoor plants.
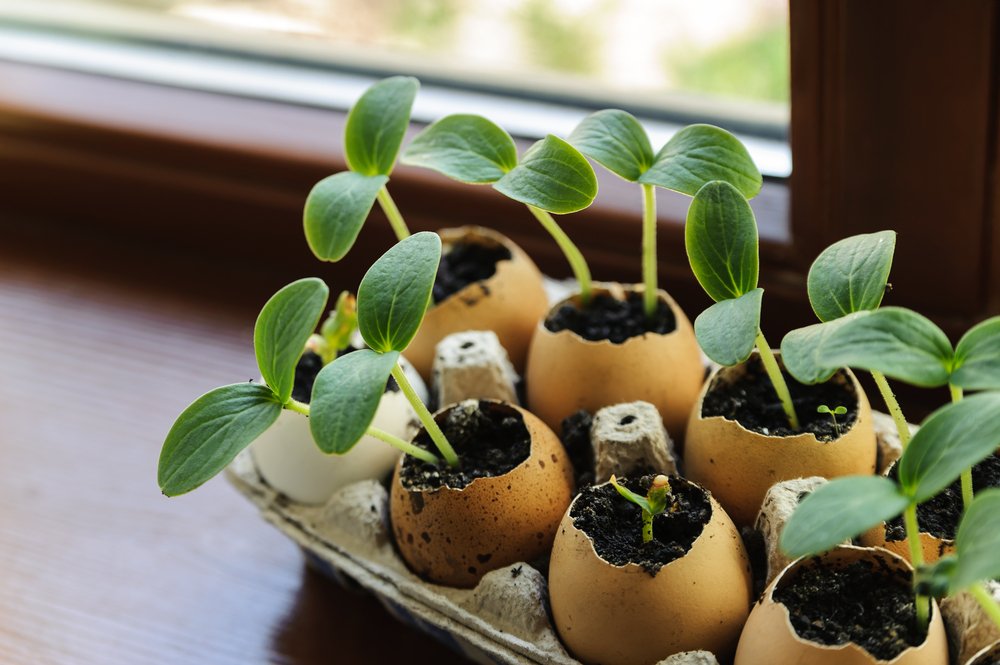
Since my family eats so many eggs, it’s easy to throw those eggshells right into the compost to help add richness to our natural fertilizers. That’s not the only use for them! We also save a few to use for starting seedlings in the springtime and to use as mulch around trees and bushes. They are a wonderful addition to our garden routine and even benefit the wildlife as many birds and wild animals will eat the shells instead of our garden.
One of my favorite hacks for gardening is to regrow vegetables from end pieces soaked in water! Tons of regular vegetables from the grocery store can be regrown with fresh new produce just by placing the root into water. It is easy to regrow lettuce, onions, and other small vegetables or herbs. You can follow this link to see over 20 different vegetables to grow in water.
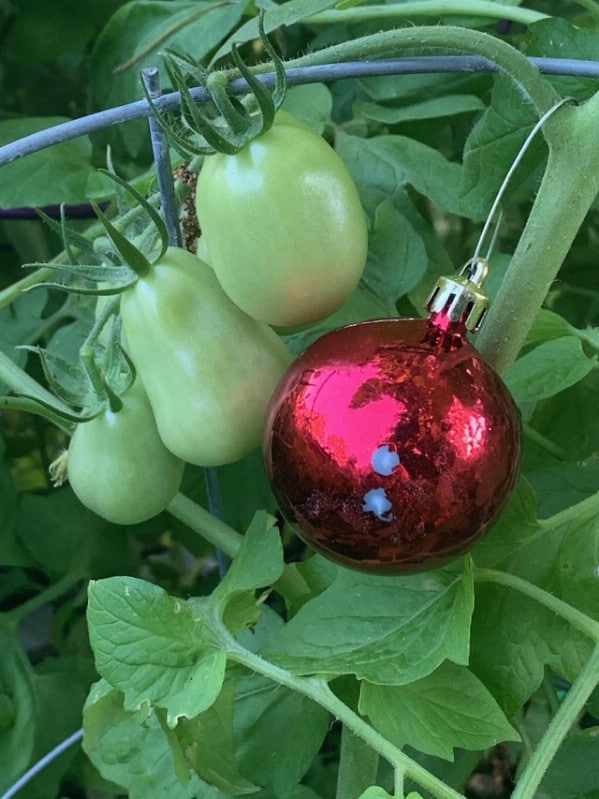
Deterring birds away from your planted veggies this hack is all about training birds to not go after your red fruits and vegetables. Hang a red ornament or red rock around your tomatoes or strawberries. The birds they will try to peck at the rock or ornament, and the result is unpleasant so they don’t do it again.
Fill a laundry basket with soil and utilize the existing holes for growing plants. This works best with berries, but can also be used for a number of plants. Add in flowers, potatoes, strawberries, and even peppers to this basket and create a pretty and useful addition to your garden.
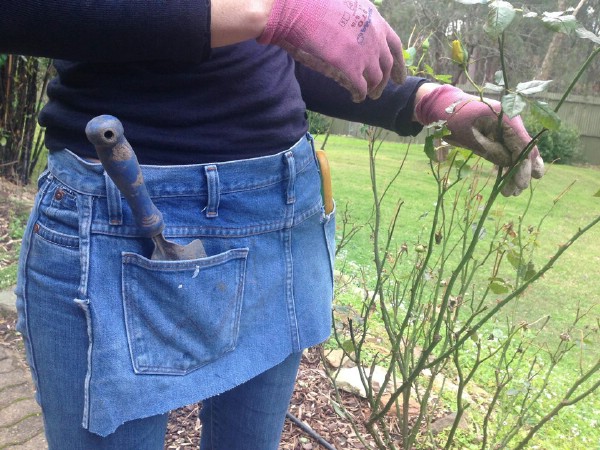
Have an old pair of blue jeans that are too small or have holes in them? Turn them into an easy useful garden apron with just a few cuts of your scissors. This can be done completely no-sew, or you can add a few extra additions like a fabric top or a pretty belt if you wish.
Gardening isn’t just about putting seeds into the dirt. There are many pieces to the puzzle of how to make your garden produce large amounts of vegetables or fruits. Mulch around the plants is just one of the factors to consider, and there are a variety of options in this post to help you know how best to mulch around your garden.
I hope these 8 gardening hacks can help you create a fun and useful garden this year!
A pineapple, for example, is considered a succulent. How’s that for food for thought?
Comment below if you knew that fact already! Not only are edible succulents interesting to look at but they come with an amazing array of health benefits for your body.
Here is a list of delicious s 4 edible succulents that you can find at your local farmers’ market, or even order online!
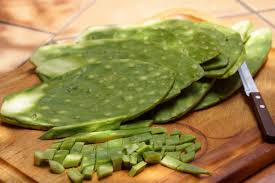
Opuntia Ficus-Indica—Prickly Pear
This Native American succulent also produces an edible fruit called Tunas that can be found in local Mexican markets.
Having been a staple food for hundreds of years, Nopales are star attractions when they are included raw in salads or salsa’s, cooked with black pepper in casseroles, or grilled with garlic butter for tacos. It has a mild, neutral flavor and the taste is similar to that of green beans or asparagus. Like Okra, they also produce a sticky substance when cooked, which should be rinsed off before eating.
Tunas, the edible fruit, grows on the tips of the leaves and it is ripe when the fruit is deep red in color and soft to touch. Tunas can be peeled, sliced and juiced or mixed in a fruit salad. The Prickly Pear has been a delicacy for ages, not only for its versatility but also for its health benefits. The leaves are packed with fiber while the fruit is high in calcium and low in calories.
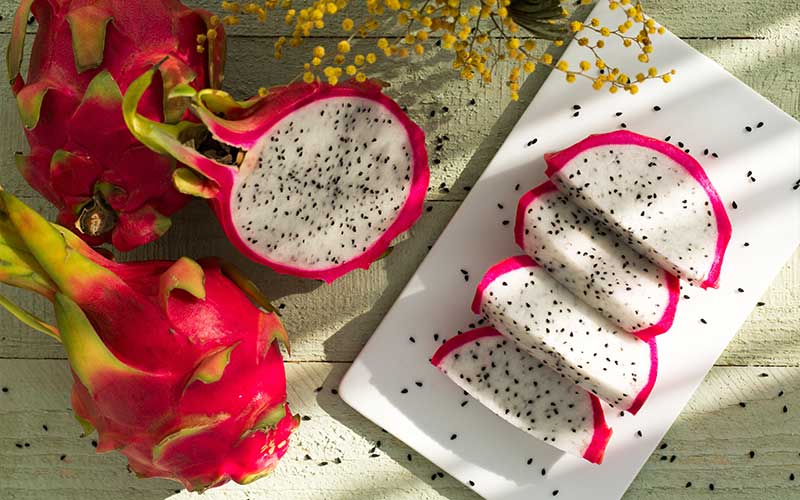
Hylocereus—Dragon Fruit
Indigenous to the Americas, the Hylocereus is an exceptional delicacy growing from a cactus that is now cultivated throughout tropical and sub-tropical regions including Southeast Asia, Australia and the Caribbean.
The cactus is colloquially known as Queen of the Night because the flowers only bloom at night and give off a fruity fragrance. Growing on vine-like stems, this succulent produces bright pink fruits with a leathery cover and scaly spikes. The Dragon fruit has a white edible pulp with tiny black seeds and has a mild flavor that can be compared to a bland, slightly sweet, kiwi or melon. The pulp can be scooped up and eaten raw, blended to enhance juices and cocktails like the ‘Dragotini’.
The Dragon Fruit is rich in antioxidants that help prevent inflammatory conditions like gout and other forms of arthritis. It also boosts low iron levels, is low in calories, and aids in weight management.
Sedum—Stonecrop
Sedum, also known as Stonecrop. This ever-forgiving succulent has water storing, edible leaves and grows rampantly on walls, as ground cover and in-between rocks. Sedum has its origins in the Northern Hemisphere but has also appeared in Africa and South America. There are about 600 species, most of which are safe to eat.
The leaves of the Stonecrop have a mild, slightly bitter, peppery taste and crispy texture, making them popular in soups, tossed in a salad or with your favorite stir-fry. The leaves can be eaten raw, steamed, or fried. Cooking the leaves helps reduce the tartness in the taste. Just like too much of something is poisonous, Sedum should be consumed in moderation as heavy consumption has been reported to cause stomach upsets.
The health benefits of munching a Sedum salad include lowering blood pressure and cholesterol. It has been identified to reduce coughing and it is recommended as a laxative.
Sea Beans
Salicornia, or sea beans, are a succulent that grows on salt marshes and sandy beaches. They are gaining popularity amongst gourmet chefs and popping up in more grocery stores across the country.
These “beans” can be eaten raw or pan-fried and have a flavor and texture similar to asparagus. A quick blanch can mellow out the intense sea salt flavor. Health Benefits: High in protein, calcium, iron, and iodine.
Salads and sautés are probably not the first things that come to mind when you see the succulent adorning your windowsill. But now you know that a lot of common succulents can also be healthy and delicious additions to your dinner plate.
Each person adores flowers and no matter whether they are happy birthday flowers or get well soon flowers, they are a part of nature which puts smiles on people’s faces. This is unquestionably the reason that they have been used so heavily in the fashion world, and here is where we have seen their impact the most. Beautiful flowers are often woven into many elements of a fashion show, from the decor to the actual designs, creating drama all around. Whether a model is carrying fresh cuts down the runway in a tote, or turning into a life-size bouquet of her own, flowers are undoubtedly the ultimate accessory. From John Galliano’s elegant floral headdresses to Virgil Abloh’s fragrant harness for Louis Vuitton.
The world is colorful because of plants and flowers, they have long been the reason that we have so many colors and for many years they were used to make paints in those colors. It is not just the color itself that serves as inspiration to fashion designers, but also the way in which different colors combine. Seeing colors appearing naturally together is a great source of style for many designers and they often attribute their style choices to what they have witnessed in the natural world.
Such as; Grace Ciao is a 22-year-old artist from Singapore who uses a unique style in her fashion illustrations. Instead of using watercolors, ink, fabric, or other conventional means, she preserves the beauty of dying flower petals by transforming them into clothing sketches. This way, the petals become not only gorgeous substitutes for lines, curves, and colors, but also become a source of inspiration themselves, introducing
It is not just the clothing which features flowers and plants, but also the presentation of clothing. Many runways around the world have been adorned with certain types of flowers to help bring out the designs of the new range of clothing which is on display. Sometimes the flowers will be used in conjunction with the designs or they may also be used to contrast against the clothing which is being used. The vibrancy and playfulness of florals make these prints ideal for spring and summer style. As more designers take on the trend, it’s becoming clear that these prints are more versatile than one would think and moreover – that this theme is here to stay.
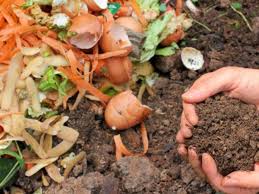
Composting is a way to feed your plants while reducing waste in your home or apartment and in local landfills. But did you know that you can get the same benefits of an outdoor compost pile or bin—without sacrificing precious lawn or patio space—through indoor composting?Composting recycles organic material and allows for the natural processes that decomposefood, yard waste and other organics to create a nutrient-rich, natural fertilizer. Compost piles heat up as microorganisms break down leaves and kitchen scraps in the presence of oxygen, giving them a second life as to fertilize gardens. Indoor composting is also advantageous for small-space dwellers since you can store a compost bin in any dark and dry space indoors, such as the basement, a closet, and under the sink cabinet.
Your best bets for compost bins are lidded plastic storage containers, garbage cans (plastic or metal), or wooden crates (topped with a wooden board cut to fit the opening). Whichever style you choose, consider size carefully: The bin should comfortably fit inside the space where you intend to store it and yet be large enough to house more than the weekly volume of food scraps you plan to compost. Generally, 18-gallon containers are a good size for households with two to four members, while smaller households with minimal food waste can get by with 5- to 10-gallon containers.
What to Put in a Compost Bin—and When
Altogether, your compost bin will contain a combination of three parts brown matter (carbon-based materials such as shredded newspaper, torn cardboard, and dead leaves) and one part green matter (the nitrogen-based materials you toss out, such as food waste and plant clippings). So, to start preparing your indoor composting collection, fill the empty bin of choice nearly three-quarters of the way with dampened brown matter. Gently hand-toss the damp bedding in the bin, then evenly sprinkle a cup of garden soil over it.
Tips for Successful Indoor Composting
Take these steps to maintain a healthy indoor compost bin.
• Don’t leave waste exposed to air in the compost bin—this will attract fruit flies. If you can’t bury the waste completely in soil or a worm layer, cover the exposed scraps with additional soil or brown matter.
• Chop or tear all kitchen scraps prior to composting. Soil microbes and/or worms can break down smaller scraps more quickly, thus speeding up the decomposition process.
• Keep a watering can and a bag full of shredded newspaper or dead leaves in close proximity to the compost bin for quick refills of water or brown matter when the compost becomes too dry or too moist.