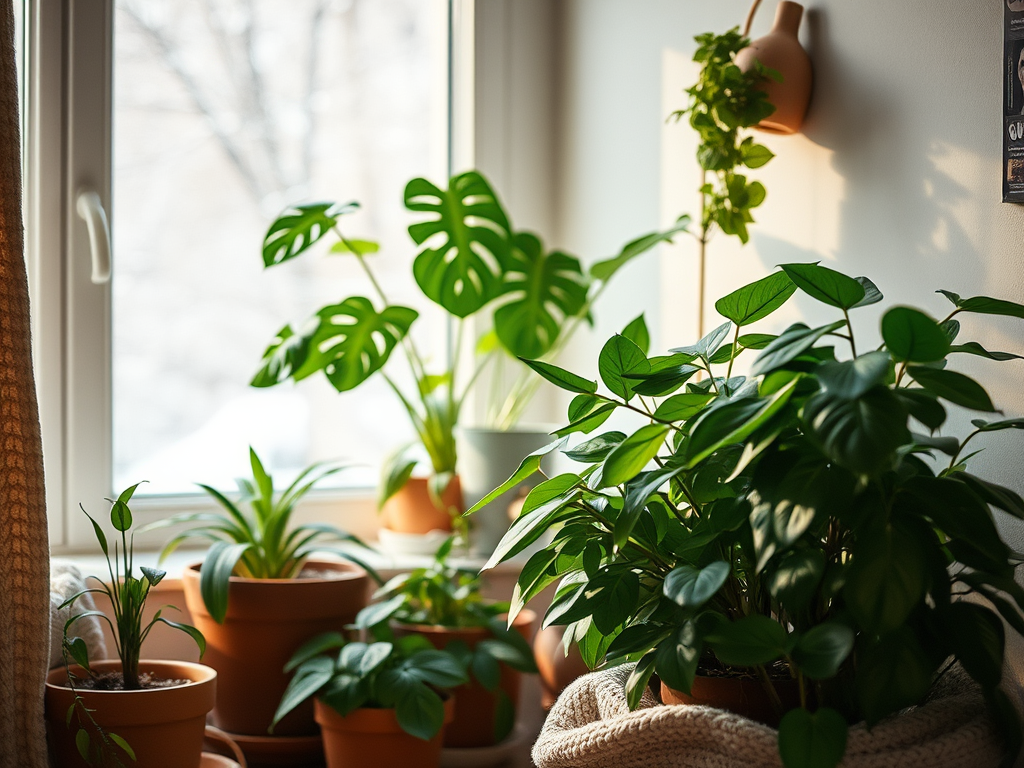
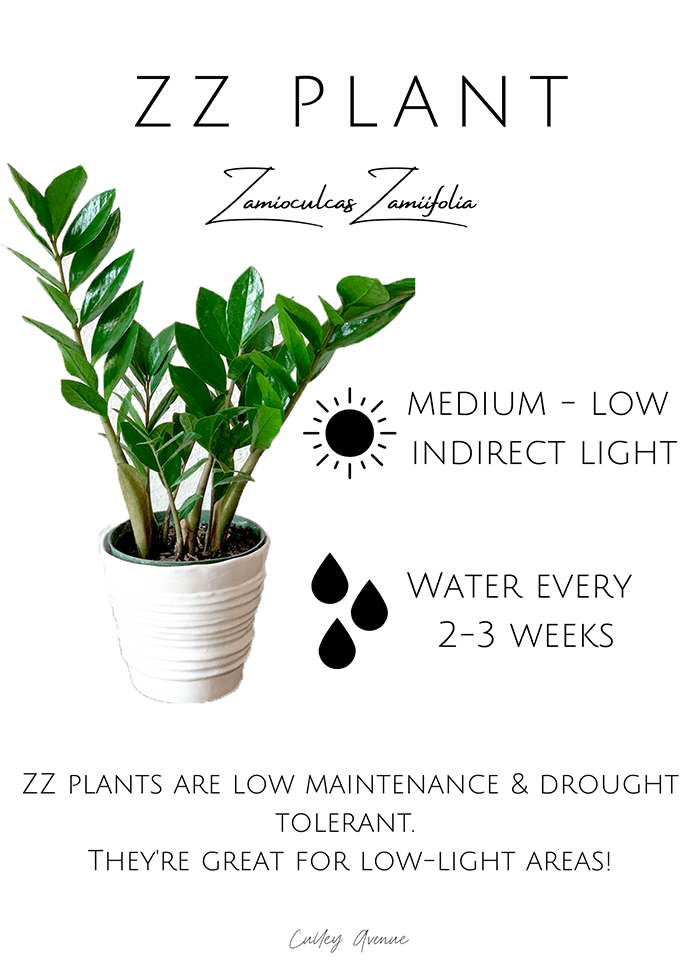
🌱 Get Free Herb Seeds with Any Purchase at Printhousedesign! 🌱

We’re excited to share a special offer with our Printhousedesign community! To show our appreciation for your support and to encourage your love for all things green, we’re including free herb seeds with every purchase at our Etsy shop! Whether you’re just starting your indoor garden or expanding your collection, these seeds are a wonderful way to add fresh, aromatic herbs to your home.

Why Herbs?

Herbs are the perfect addition to any garden, big or small. They’re not only practical and delicious in recipes, but they’re also easy to grow indoors or on a sunny windowsill. Imagine fresh basil, parsley, or rosemary at your fingertips, ready to elevate your cooking and add a fragrant touch to your kitchen or patio.

How It Works

From now until supplies last, each order you place at Printhousedesign will come with a complimentary packet of herb seeds. We’ve selected a variety of herbs that are easy to grow and care for, even for beginner gardeners.

What to Expect

  • Free Herb Seed Packet: Automatically included with your order—no need to add anything extra to your cart.
  • Easy Growing Guide: Each seed packet comes with simple instructions to get you started.
  • Eco-Friendly Packaging: In line with our love for nature, the seeds are packed in eco-friendly packaging.

Grow Your Garden with Printhousedesign 🌿

This seed giveaway is our way of saying “thank you” and sharing the joys of gardening with our wonderful customers. Whether you’re getting one of our 3D printed nature-inspired planters or browsing our gardening essentials, you’ll have everything you need to grow your own little herb garden.

Take advantage of this offer by visiting our Etsy shop, Printhousedesign, and start growing your own herbs today!

Happy planting and happy shopping! 🌱

How to Get Your Air Plant to Bloom 🌸

Hello, green thumbs! Today, let’s dive into one of the most exciting stages of air plant care—encouraging your plant to bloom! While air plants (Tillandsia) are known for their versatility and ease, it can take a bit of extra care to see that beautiful, colorful flower. Here are some tips to help your air plants thrive and blossom.

1. Understand the Blooming Cycle 🌱

Air plants usually bloom only once in their lifetime, so it’s a special event! The bloom is often short-lived but beautiful, showing off vibrant pinks, purples, reds, or oranges. Blooming typically signals the end of an air plant’s life cycle, but don’t worry—after blooming, air plants produce “pups” (baby plants) that will continue the cycle.

2. Provide Proper Lighting ☀️

Air plants thrive in bright, indirect sunlight, and this is especially important for blooming. If they’re indoors, place them near a bright window or under fluorescent lighting. Too much direct sunlight can scorch them, so avoid positioning them in the path of strong rays. Outdoors, they love dappled sunlight or partial shade.

3. Regular Soaking 💧

To encourage blooming, keep your air plant well-hydrated. Soak it in room-temperature water for 20–30 minutes once a week. After soaking, shake off excess water and let it dry upside down to prevent any water from sitting in the base, which can cause rot. For dry or hot climates, a light misting every couple of days can keep it extra happy.

4. Add a Little Air Plant Fertilizer 🌱

Using a bromeliad or air plant-specific fertilizer once a month can boost your plant’s blooming potential. Dilute the fertilizer in water according to the instructions, and soak your air plant in the mixture as usual. Avoid over-fertilizing, as this can cause leaf damage. A little boost goes a long way!

5. Temperature and Humidity 🌡️

Air plants are happiest in temperatures between 50–90°F, so try to keep them in these ranges if possible. While they can adapt to drier conditions, air plants naturally prefer moderate to high humidity, which helps stimulate blooming. You can increase humidity by misting or by placing a small dish of water nearby (though not directly under the plant).

6. Be Patient 🌼

Blooming is a natural process that often requires time. Some air plants, especially larger varieties, can take years to bloom, so don’t get discouraged if you don’t see blooms right away. With consistent care, your air plant will reward you in its own time.

Bonus Tip: Ethylene Gas Trick 🍎

Some air plant enthusiasts swear by using ethylene gas to encourage blooming! Place your air plant in a sealed container with a ripe apple or banana for a few days. The gas released from the fruit can trigger blooming. Be careful not to leave it too long, though, as too much exposure can harm the plant.

Blooming and Beyond 🌈

Once your air plant blooms, continue the same care routine. After the bloom fades, keep an eye out for pups growing at the base. These can be separated when they’re about half the size of the parent plant or left to create a cluster—a mini air plant family!

Happy blooming, and let me know if you see flowers on your air plants! Share your photos and stories—I’d love to see them!

Happy gardening!

Bloom & Grow: Join Our Gardening Community Newsletter!

Join Our Gardening Community!

Are you looking to add a little more green to your life? 🌱 Whether you’re an avid gardener, a houseplant newbie, or just love learning new tips to keep your plants thriving, our bi-weekly gardening newsletter is here to help!

What You’ll Get in Our Newsletter:

🌿 Seasonal Gardening Tips – Stay in tune with nature’s cycles. We’ll guide you on what to plant, prune, and harvest each month.

🪴 Houseplant Care Advice – From watering tricks to lighting needs, our tips will help you keep your indoor plants healthy and happy year-round.

🌻 Exclusive Offers and Event Updates – Be the first to know about our workshops, garden shop updates, and special seasonal offers!

Our newsletter is designed to make caring for plants simple, fun, and rewarding. Whether you’re a beginner or a seasoned plant parent, there’s something here for you.

Sign Up Today!

Ready to grow along with us? Sign up below to start receiving your bi-weekly dose of gardening and houseplant tips!

Sign Up: https://printhousedesign.aweb.page/p/0af57b2b-75b6-4703-9e77-27ae244cd9e3

Enigmatic Medusa Air Plant: Care Tips and Where to Find One

The Medusa air plant (Tillandsia caput-medusae) is one of the most fascinating air plants you can find. With its twisting, tendril-like leaves resembling the legendary Gorgon’s snakes, this plant is as captivating as it is easy to care for. Whether you’re new to air plants or a seasoned enthusiast, the Medusa plant will bring a touch of exotic elegance to your collection. Let’s dive into how to care for this plant and how you can find one at Printhousedesign on Etsy!

The Unique Appearance of the Medusa Air Plant
One look at the Medusa air plant, and you’ll understand its namesake. Its curving, tubular leaves grow from a central base, spreading out in spirals that resemble the head of Medusa. This plant’s vibrant green tones and intricate shape make it ideal for a standalone display or an accent in air plant arrangements.

Medusa Air Plant Care Guide

  1. Lighting Needs
    Medusa plants thrive in bright, indirect light. A windowsill with filtered sunlight or a spot near a bright indoor light source is perfect. Avoid placing it in direct sunlight for long periods, as this can scorch the leaves.
  2. Watering Routine
    Since the Medusa is naturally from more humid environments, it prefers a good soak every one to two weeks. Submerge it in water for about 20 to 30 minutes, then shake off the excess. Allow it to dry completely upside down before returning it to its display to prevent water from collecting at the base, which can lead to rot.
  3. Temperature and Humidity
    This air plant prefers temperatures between 50-90°F. If you live in a drier climate, you can increase humidity by misting the plant lightly once a week, especially during warm weather or when the air feels particularly dry indoors.
  4. Air Circulation
    Good air circulation is key. After watering, ensure it dries fully in a well-ventilated area. Unlike traditional potted plants, air plants like the Medusa need airflow to absorb moisture and prevent rot.
  5. Fertilizing
    Monthly or bi-monthly fertilizing with a bromeliad or air plant-specific fertilizer during the growing season can boost its health and even encourage blooming. Add a few drops of fertilizer to your water soak, or mist it with a diluted solution.

Where to Find the Medusa Air Plant
If you’re ready to add this exotic air plant to your collection, check out Printhousedesign on Etsy. I offer a carefully curated selection of Medusa air plants, housed in nature-inspired 3D printed planters designed to complement the plant’s natural beauty. Each plant is selected and packaged with care to ensure it arrives healthy and ready to brighten your space! http://www.printhousedesign.com

Growing and Keeping Mums Thriving Through November

Mums, or chrysanthemums, are quintessential fall flowers, adding vibrant color to gardens, porches, and patios just as the temperatures begin to dip. While often treated as annuals, mums can be coaxed to return year after year with the right care. Here’s how to plant, nurture, and keep these beauties thriving through November and beyond.


1. Choosing the Right Mums

There are two main types of mums to consider:

  • Garden Mums: These are hardy perennials, better suited for outdoor beds and capable of surviving winter with care.
  • Florist Mums: Often sold as potted plants, they’re intended for short-term displays. Though beautiful, they are less cold-tolerant and rarely survive the winter outdoors.

When buying mums for the garden, opt for hardy garden varieties if you want to enjoy their blooms into November and have a chance of seeing them come back next year.


2. Planting Mums in the Garden

For best results, plant mums in early fall, ideally before the first frost:

  • Location: Mums thrive in full sun. Aim for six or more hours of sunlight a day to ensure they bloom well and develop sturdy stems.
  • Soil: Choose well-draining soil that’s rich in organic matter. Mums prefer slightly acidic to neutral soil (pH 6.5–7). Amending the soil with compost or aged manure before planting can give them a strong start.
  • Spacing: Plant mums about 18–24 inches apart to allow air circulation and reduce the risk of disease.

3. Watering Tips for Mums

Mums prefer consistent moisture but don’t like soggy soil:

  • Frequency: Water them deeply at least once a week. Increase frequency if the soil dries out quickly or if your area experiences dry spells.
  • Mulching: Apply a layer of mulch around your mums to help the soil retain moisture and regulate temperature. Use straw, shredded bark, or leaves to protect the roots.

4. Encouraging Bloom Longevity

Mums are sensitive to frost, but with care, you can enjoy their blooms well into November:

  • Deadheading: Remove spent blooms regularly to encourage new flowers and keep plants looking tidy.
  • Frost Protection: Use row covers or lightweight blankets to shield mums on nights when frost is forecasted. This helps them last through early November frosts.
  • Pruning: After your mums have bloomed, you can cut them back by a third to encourage regrowth next season if they’re a hardy variety.

5. Overwintering Mums

If you want your mums to come back next year, winterize them in late fall:

  • After First Frost: Wait until the first hard frost before preparing them for winter. Once the blooms fade, cut back the plants to about 3–4 inches.
  • Mulching for Winter: Add an extra layer of mulch around the base to insulate the roots through the cold months.
  • Potted Mums: If you’re growing mums in containers, bring them into an unheated garage or basement where temperatures stay above freezing. Water them sparingly over the winter.

6. Feeding Mums in Spring for a Full Bloom Cycle

For mums planted in the ground, a bit of care in early spring sets them up for a beautiful bloom season next fall:

  • Early Fertilization: In spring, add a balanced, slow-release fertilizer to the soil.
  • Pinching: To encourage bushy growth and more blooms, pinch back the stems in early summer. Stop pinching by July to allow the buds to set for fall blooms.

With these steps, your mums can flourish through November, adding vibrant color to your garden or patio well into the colder months. And with proper overwintering, you’ll have a head start on next year’s blooms. Happy gardening!

Home is Where the Boat Is

Potting, Puttering & Pontooning

Cats and Trails and Garden Tales

Musings on cats, travel, gardens and life

Leaf And Twig

Where observation and imagination meet nature in poetry.

phillipsplace

A new beginning, mobile home living, adding our style inside and out.

Ruth E. Hendricks

Daily Journal of Life in Pittsburgh

The Haute Mommy Handbook

Motherhood Misadventures + Creative Living

Suzanne's Mom's Blog

Arts, Nature, Good Works, Luna & Stella Lockets & Birthstones

𝑻𝒐𝒓𝒏𝒂𝒅𝒐 𝑶𝒇 𝑪𝒉𝒂𝒐𝒔 🌪

Thoughts, experiences and learnings in a turbulent time

Sarah Rajkotwala - Author & Spiritual Teacher blog

Gardening Fairies Flowers Spirituality Angels Love Joy

Ideas and Advice for How To Live a Joyful and Empowered Life.

All Things Empowering - Healing Ourselves & Earth, Self-Sufficiency, Food Forests, Gardening, Art, Road Trips, Preserving, Foraging, Permaculture, Homesteading and More!

AmericaOnCoffee

We’re just inviting you to take a timeout into the rhythmic ambiance of our breakfast, brunch and/or coffee selections. We are happy whenever you stop by.

Heart to Hearth Cookery

Sharing my Experimental Archaeology of Food

The Herb Society of America Blog

Learn • Explore • Grow