It doesnβt bloom because every day is perfect. It grows through storms, stretches toward the light, and keeps reaching higher even after days of heat, wind, and rain.
And maybe thatβs a little reminder we all need on a Monday.
π» You donβt have to have everything figured out to keep growing.
Some seasons of life feel like sunshine, while others feel more like a garden after a storm. But just like a sunflower, we can choose to keep turning toward the light.
Growth can be slow. Progress can be messy. And sometimes, simply showing up is enough.
So this Monday, give yourself permission to grow at your own pace. Tend to the things that bring you joy, let go of what no longer serves you, and keep reaching toward your own little patch of sunshine.
Your garden doesnβt bloom all at onceβand neither do you. π»
π± Monday Garden Question:
What is one thing youβre choosing to growβeither in your garden or in your lifeβthis week?
If youβre new to air plants, you may be wondering, βWhich air plant is easiest to care for?β π±
Around here, one of our favorite answers is Tillandsia harrisii. This beautiful little air plant is hardy, forgiving, and a wonderful choice for beginners. In fact, with the exception of the impressive Tillandsia xerographica, Harrisii is one of the hardiest air plants you can grow.
Both of these plants are members of the Tillandsia family and have adapted to life without traditional soil. Instead of growing their roots in the ground to absorb water and nutrients, they use their leaves to take in moisture and nutrients from the air.
Tillandsia harrisii is a striking air plant with silvery-green leaves covered in tiny scales called trichomes. These trichomes help the plant absorb moisture and reflect sunlight, making Harrisii especially well adapted to drier conditions.
One of the things I love most about Harrisii is its forgiving nature. It doesn’t need constant attention, making it a fantastic choice for someone who loves plants but occasionally forgets to water them.
βοΈ Harrisii Light
Harrisii enjoys bright, indirect light.
An area near a bright window is perfect, but avoid placing it directly against a hot, sunny window for extended periods. Too much intense afternoon sun can cause the plant to become stressed or develop brown, crispy areas.
A few hours of gentle morning sunlight can be beneficial.
Tip: If your Harrisii is green rather than silvery, don’t assume it needs more water. The amount of visible silver comes from its trichomes and can change depending on how hydrated the plant is.
π¦ How to Water Harrisii
Harrisii is fairly forgiving when it comes to watering, but proper drying is extremely important.
The soak method:
Fill a bowl with room-temperature water.
Completely submerge the air plant.
Let it soak for approximately 20β30 minutes.
Remove the plant and gently shake off excess water.
Place it upside down or on its side in a well-ventilated area.
Allow it to dry completely before returning it to its display.
Depending on the humidity in your home, Harrisii may need watering approximately once a week.
During very dry or hot weather, it may appreciate watering more frequently.
π¨ The most important rule:
Never leave water trapped inside the center of the plant.
Air plants don’t like sitting wet for long periods. Poor air circulation combined with trapped moisture can lead to rot.
When in doubt, remember:
Soak β Shake β Dry β Display!
πΏ Meet Tillandsia Xerographica
If Harrisii is the easy-going member of the family, Xerographica is the dramatic showstopper. π€
Tillandsia xerographica is one of the largest and most spectacular air plants commonly grown by collectors. Its broad, silvery leaves curl and twist into a beautiful rosette.
The name xerographica comes from the Greek words associated with dryness, which is fitting because this plant is exceptionally well adapted to dry conditions.
Its thick, silvery leaves and abundant trichomes help it conserve moisture.
And here’s the great news:
Xerographica is remarkably hardy.
In fact, it often does better with less water than many other air plants.
βοΈ Xerographica Light
Xerographica loves bright light.
Place it near a bright window where it receives plenty of indirect sunlight. It can tolerate more direct light than many greener Tillandsias, especially gentle morning sun.
However, intense afternoon sunlight through glass can become surprisingly hot and may scorch the leaves.
A bright room with good air circulation is ideal.
π¦ How to Water Xerographica
Xerographica doesn’t need to be soaked as frequently as many other air plants.
A good starting point is approximately every 1β2 weeks, depending on your home’s humidity, temperature, and airflow.
When watering:
Give the plant a thorough soak.
Gently shake out excess water.
Turn it upside down or position it so water can drain away.
Allow it to dry completely.
Return it to its display once completely dry.
Because Xerographica has thick leaves and a dense center, drying is especially important.
If your home is humid, you may need to water less often.
π¬οΈ Airflow Is Just as Important as Water
Here’s a little air plant secret:
Air plants don’t just need waterβthey need to dry afterward.
Good air circulation helps prevent moisture from becoming trapped between the leaves.
This is particularly important for Xerographica because of its large, tightly curled leaves.
A ceiling fan, small room fan, or simply placing your plant somewhere with natural airflow can help.
Avoid displaying your air plant in a sealed terrarium unless the container provides plenty of ventilation.
π‘οΈ Temperature & Humidity
Both Harrisii and Xerographica prefer comfortable household temperatures.
A general range of approximately 50β90Β°F works well, although they should be protected from extreme temperatures.
Keep them away from:
β Heating vents
β Air-conditioning vents
β Freezing temperatures
β Extremely hot windows
β Areas where water cannot evaporate
They can tolerate lower humidity because of their trichomes, but extremely dry indoor environments may require more frequent watering.
π± Do Air Plants Need Fertilizer?
They can benefit from occasional fertilizer, but don’t overdo it.
Use a fertilizer specifically formulated for air plants or bromeliads and dilute it according to the product directions.
Fertilizing approximately once a month during active growth is generally plenty.
Too much fertilizer can damage the plant, so when it comes to feeding air plants, less is more.
πΏ Harrisii vs. Xerographica: Which Is Easier?
Both are excellent choices, but they have slightly different personalities.
Care
Harrisii
Xerographica
Beginner Friendly
βββββ
βββββ
Light
Bright, indirect
Bright, indirect to gentle direct
Water
About weekly
About every 1β2 weeks
Drying
Very important
Extremely important
Humidity
Moderate
Low to moderate
Airflow
Important
Very important
Difficulty
Easy
Easy
Appearance
Silvery, upright leaves
Large, curly, dramatic leaves
If you’re buying your first air plant, Harrisii is a wonderful place to start.
If you want a statement plant that looks like a piece of botanical sculpture, Xerographica is hard to beat!
πΏ Ready to Try an Air Plant?
If you’ve been nervous about growing air plants, Harrisii is a fantastic beginner plant. It’s hardy, beautiful, and forgiving enough to survive a few beginner mistakes.
And when you’re ready to add a showstopper to your collection, bring home a Xerographica and let those gorgeous silver curls take center stage.
The best part?
No soil. No messy pots. Just a little water, light, airflowβand a whole lot of personality. πΏβ¨
Bring Natural Beauty to Your Front Door with Moss & Tillandsias
One of my favorite ways to decorate with air plants is by creating a living wreath. Unlike traditional wreaths that fade after a season, this natural grapevine wreath can be enjoyed for years with just a little care. Air plants (Tillandsia) don’t require soil, making them the perfect choice for creating a lightweight, eye-catching piece of living art.
The wreath pictured above uses a rustic grapevine base, preserved moss, and a variety of air plants that create texture, movement, and color. Here’s how you can make one yourself!
Supplies You’ll Need
16β18 inch grapevine wreath
Assorted live air plants (8β12 plants)
Preserved sheet moss or reindeer moss
Floral wire (22β26 gauge)
Green floral pins (optional)
Fishing line or jute twine
Hot glue gun (for moss onlyβnot for attaching the air plants)
Wire cutters
Spray bottle filled with water
The Best Air Plants for This Wreath Using several different species creates the layered, natural look that makes this wreath so stunning. 1. Tillandsia xerographica The showstopper! Place one large Xerographica near the lower left side of the wreath. Its wide silver leaves become the focal point. Why it works Elegant rosette shape Drought tolerant Beautiful silver color Long-lasting
2. Tillandsia capitata Peach or Green These provide a fuller appearance with graceful curved leaves. Place two or three throughout the center grouping.
3. Tillandsia ionantha These tiny plants tuck perfectly into small openings. Their compact size helps fill empty spaces, and many blush bright red before blooming.
4. Tillandsia stricta Adds texture with its dense, upright leaves. Great for filling middle sections.
Tillandsia bulbosa or caput-medusae
Their twisting, whimsical leaves add lots of personality.
Use one near the top for a dramatic cascading effect.
Step 1: Prepare the Wreath
Lay the grapevine wreath flat on a table.
Decide which section will hold your plants. This design looks best when about one-third of the wreath is decorated while the remaining grapevine stays exposed.
This asymmetrical style gives the wreath a modern botanical feel.
Step 2: Add the Moss
Using small amounts of hot glue, secure preserved moss into the grapevine.
The moss creates a soft woodland appearance while hiding floral wire.
Don’t cover the entire wreathβleave plenty of grapevine visible.
Step 3: Arrange Your Air Plants
Before attaching anything, simply set each air plant on the wreath.
Start with the largest plant first.
Arrange medium-sized plants around it.
Finish with the smallest air plants tucked into gaps.
Step back several times to make sure the arrangement feels balanced.
Step 4: Secure the Plants
Never glue air plants directly.
Instead:
Wrap thin floral wire gently around the base of each plant.
Thread the wire through the grapevine.
Twist the wire behind the wreath until snug.
Hide the wire beneath the moss.
Fishing line also works wonderfully because it becomes nearly invisible.
Step 5: Add Finishing Touches
Tuck additional moss around the plants.
Allow several air plants to extend slightly beyond the wreath edge to create a more natural, flowing appearance.
Avoid making everything perfectly symmetricalβthe organic look is part of the charm.
Caring for Your Living Wreath
Because these are live plants, they’ll appreciate a little attention.
Watering
Once each week:
Remove the wreath from the wall.
Soak the air plant portion in room-temperature water for 20β30 minutes.
Shake away excess water.
Allow the wreath to dry upside down for several hours before rehanging.
During hot summer weather or in very dry homes, lightly mist the plants between soakings if needed.
Light
Hang your wreath in:
Bright, indirect light
A covered porch
A shaded patio
Near a sunny window indoors
Avoid intense afternoon sun, which may scorch the leaves.
July has been a wonderfully busy month, and before I knew it, our newsletter date had slipped right past me! Thank you so much for your patience and for continuing to be part of this growing garden community. Whether you’re tending a backyard oasis, a tiny porch garden, or just keeping a few favorite houseplants happy, I’m so grateful you’re here.
Now let’s dig into this month’s gardening inspiration!
π± Three Herbs You Can Still Plant in July (Perfect for Porch Pots!)
Think it’s too late to grow herbs? Not at all! These three thrive in containers and love soaking up the summer sunshine.
πΏ Basil
Basil is one of the easiest herbs to grow in a pot.
Growing Tips
Plant in a container with excellent drainage.
Give it 6β8 hours of sunshine daily.
Water when the top inch of soil feels dry.
Pinch off flower buds to encourage more leafy growth.
Harvest: Pick leaves regularly from the top of the plant, and it’ll continue producing all summer.
πΏ Rosemary
This fragrant herb loves warm weather and makes a beautiful porch plant.
Growing Tips
Use a well-draining potting mix.
Water deeply but allow the soil to dry between waterings.
Place in full sun.
Harvest: Snip a few stems whenever needed. Fresh rosemary is wonderful for cooking, homemade herbal oils, and even natural hair rinses.
πΏ Chives
Chives are incredibly beginner-friendly and keep producing for months.
Growing Tips
Grow in full sun or light afternoon shade.
Keep the soil consistently moist.
Divide clumps every few years to keep plants vigorous.
Harvest: Cut leaves about 2 inches above the soil and they’ll quickly grow back.
π₯ Growing & Harvesting Cucumbers
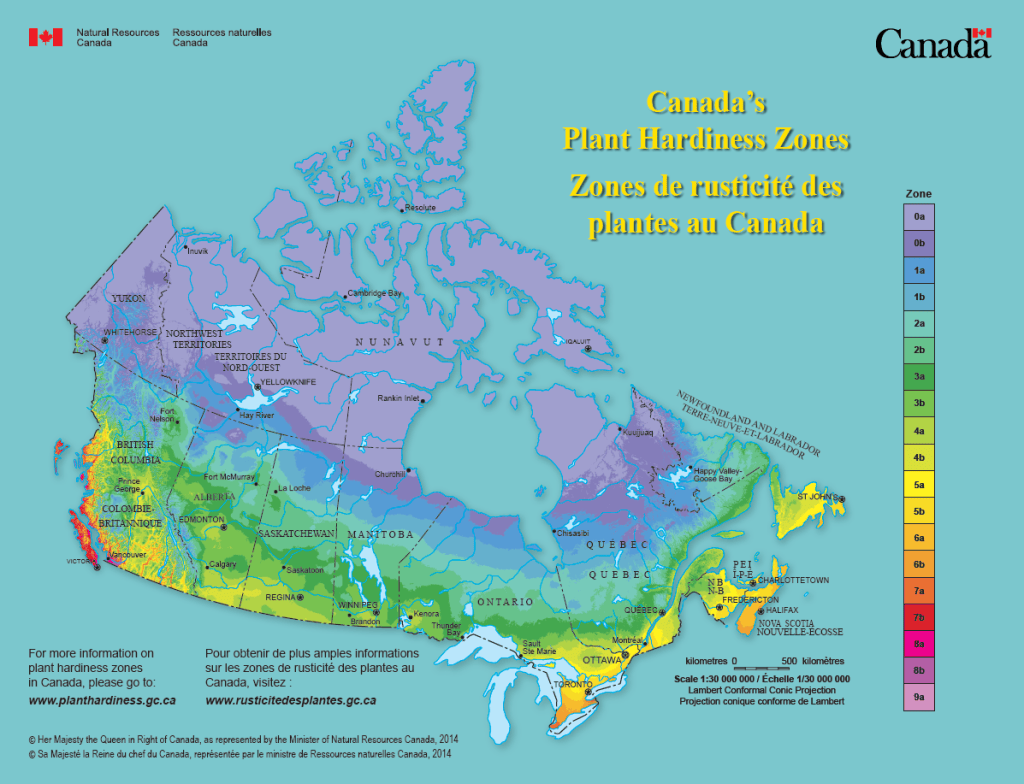
Zones 6, 7 & 8)
There’s nothing quite like picking a crisp cucumber straight from the garden!
Planting
In Zones 6β8, July is still a great time to sow another crop of cucumbers for a late summer or early fall harvest, especially if you choose fast-maturing varieties.
Plant in full sun.
Mix compost into the soil before planting.
Space plants 12β18 inches apart.
Keep soil consistently moist.
A trellis saves space, improves airflow, and helps produce straighter cucumbers.
Harvesting
The secret to productive cucumber plants is harvesting often!
Pick slicing cucumbers when they’re 6β8 inches long.
Pick pickling cucumbers at 3β5 inches.
Don’t allow fruits to become oversized, or the plant will slow production.
Harvest every couple of days during peak season.
Garden Tip: Water at the base of the plant instead of overhead to help reduce powdery mildew during the heat of summer.
Turn a simple terra cotta flower pot into a fun summer-inspired planter perfect for porches, patios, BBQ tables, or garden spaces! This easy DIY uses bold red, white, and blue colors with a rustic farmhouse touch!
Supplies Needed
Terra cotta flower pot
White chalk paint or acrylic paint
Red acrylic paint
Blue acrylic paint
Foam brushes or paint brushes
Painterβs tape
Star stencil or star stickers
Sandpaper (optional for distressed look)
Clear sealer spray (optional)
Potting soil
Summer flowers or herbs
Step 1: Prep the Flower Pot
Start with a clean terra cotta pot. Wipe away any dust or dirt so the paint sticks smoothly.
Step 2: Paint the Base White
Using white chalk paint, coat the entire flower pot. Let dry completely before adding the next layer. You may need 2 coats for full coverage.
Step 3: Create Red Stripes
Use painterβs tape to mark off stripe sections around the pot. Paint the open sections red using a foam brush for a rustic handmade look.
Tip: Donβt worry about perfectly straight lines β the slightly imperfect brush strokes give it charming cottage-style character.
Step 4: Paint the Rim Blue
Paint the top rim of the planter bright blue. Allow it to dry fully before moving to the next step.
Step 5: Add White Stars
Use a small stencil, star stickers, or hand-paint stars around the blue rim for a patriotic summer theme.
Step 6: Distress the Pot (Optional)
Lightly sand a few edges and stripes for a weathered farmhouse finish.
Step 7: Seal Your Design
Spray with a clear outdoor sealer if the planter will stay outside during summer rain and heat.
Step 8: Add Flowers πΈ
Fill the planter with potting soil and your favorite summer blooms.