Growing strawberries in containers

Strawberries make ideal container fruits given their compact and quick-growing habit, although they are equally at home within a keen bed. Hanging baskets, terracotta pots and special strawberry planters are just some of the containers to grow them in, though for rustic effect I prefer old wooden wine or vegetable crates. There are a number of distinct advantages to growing strawberries in tubs of any kind. Plants can be moved to track the sun, thereby enjoying more warmth and light than they might otherwise. They can be lifted off the ground to avoid the interest of slugs and dodge soil-borne diseases. And plants can be moved under cover in winter to force an extra-early crop.

Planting Strawberries in Containers

Late spring into early summer is the right time of year to plant bare-root runners that have been cold-stored to hold them back. Brought out of the cold and sold on, they will get away very quickly indeed to give a pick of fruits in as little as two months. Alternatively, you can plant regular pot-sold strawberries which should also bear fruit in the same summer.

Set plants into multipurpose potting soil, spacing them 25-30cm (10-12in) apart – this is closer than they would be in the ground as it will be easier to water and feed them. Bare-root runners can look quite severe with their minimal top growth and often less-than-plump roots. This is normal, so worry not! Give the runners a soak in a bucket of water to revive them or water pots of strawberries if they are at all dry.

Caring for Strawberries in Containers

Adding compost should be helpful and needs to be kept moist by watering whenever the soil dries out. When watering, try to keep moisture off the leaves to prevent fungal diseases getting a hold and spoiling the fruits. If you can, carefully lift the leaves to apply the water to your sunken pots. Your plants will also appreciate regular feeding with a high-potash liquid feed as soon as the first flowers appear – a brand sold for feeding tomato plants will work just fine for this purpose.

Keep your container of strawberries in a sunny part of the garden, patio or terrace in order to encourage young fruits to swell and ripen. Developing strawberries can be kept clean of compost by tucking in wood chips or straw beneath the fruits to lift them clear. Drape netting over the tubs if birds start to nab your fruits.

After fruiting is over foliage can be cut back to leave just the central, young leaves intact. Runners should be removed, unless you want to propagate new plants, to ensure plants bulk out again before winter. If you have never grown strawberries before then housing them in containers is a great way to start. It’s an almost fool-proof option and the rewards are indescribably sweet! Plant, water, feed and enjoy!

Backyard Composting

Backyard composting 101 can have a substantial impact to aid gardening and lawn care. It’s not a passing trend that will be forgotten, so if you have the right conditions and preparation, you should start a compost pile for yourself.

Gardeners have known for a while how beneficial using compost as a soil amendment is. Homeowners are slowly becoming aware that compost can be incredibly useful in their lawns.

What Is Composting?

Organic composting is a natural process where a pile of yard waste and kitchen scraps is broken down. Mix the right ingredients in the right proportions and bacteria, fungi, and worms produce an organic material that praised as “black gold.” The precious organic matter is then added to the soil to improve its structure, fertility, and water holding capacity.

The composting process needs four plus one components to happen:

Carbon (C)

Nitrogen (N)

Moisture

Oxygen (O2)

Microorganisms

In the presence of moisture and oxygen, two types of microorganisms such as bacteria, fungi, bugs, and worms to work in three stages to create compost. How long the entire process takes depends on how involved you are, the size of your pile, and what you put into it. The right balance of ingredients allows microorganisms to decompose carbon (C) and nitrogen (N) so plant life can further extract nutrients and grow to release oxygen (O2) back in the atmosphere. The more nutrient soil is, the more greenery will thrive.

The Materials in a Compost Pile

 Most decomposable materials in compost piles can be classified as either brown or green materials, depending on their makeup.

Materials for composting: BROWN & GREEN

Brown materials are carbon-rich items that provide energy to the microorganisms in the pile and give compost its light, fluffy body. Typical brown items are more wood-based, or fibrous: dry leaves, branches, stems, sawdust, tree bark, shredded newspaper, corn stalks, wood ash, and pine needles.

Green materials are nitrogen-based waste materials. They provide amino acids and proteins needed for the bacteria and fungi to do their job. Manures, food scraps, coffee grounds, green leaves, and grass clippings are excellent nitrogen-rich green materials. A simple rule of thumb is to make sure the compost pile has approximately 2/3 “brown” materials and 1/3 “green” materials.

There are many different ways to make compost in your back yard; the main difference is where you pile your materials or use a composter. The different methods for backyard composting 101 offer flexibility and vary in cost and difficulty.

Piling is a simple, common process. Materials are literally heaped into a pile and turned periodically to aerate.

Composting bins are either open or enclosed bins that contain everything. Open bins are a partial structure allowing for ventilation and aeration while keeping materials confined. One side is easily accessible to add materials and turn the pile. Enclosed bins completely enclose the process via a lid and eliminate both the sight of a compost pile and the smell.

Tumblers are a unique, efficient type of enclosed compost bin. Cylindrical in nature, a tumbler has hand-hold insets or a handle that allows it to be “turned” or tumbled easily.

What Foods Can composted?

Fruit or Vegetable leftovers

Meat leftovers

Coffee leftovers

Eggshells

Tea

Leaves

Wood

Shredded paper

Soiled cardboard

What can’t composted:

Animal byproducts – dairy, bones, and meat,

Foods rich on fat and oil – mayonnaise, peanut butter, salad dressing or vegetable oils

Feces – dog, cat or human

Garden waste treated with pesticides

Garden waste from sick plants

Weeds will grow instead of decomposing

Biodegradable plastics

How to Tell When Your Compost is Ready

When all of the waste has been broken down, and the compost is ready to use the temperature of the pile will drop dramatically. The resulting material will look and feel like really dark, rich soil with a deep, earthy smell.

Have you started compost? If so, please leave a comment

How to grow avocado tree

First clean and prepare the pit by suspending it in a glass of water using 3-4 tooth picks along the sides of the avocado pit, for the bottom to hang into the water. Which side of the avocado seed goes in the water?

The toothpicks should be supporting the seed so that the pointed half is out of the water and the bottom half is in the water. The sprouting tip will come out of the pointed end, so be sure the flat end is immersed in water.

Next place the glass with pit in a sunny window sill and change the water every other day. Make sure the water is at room temp. The pit will split after two weeks at this time carefully pull off the skin.

Four to Eight weeks later the stem will start to break and rise up from the middle of the pit. The roots should be growing and at this time is when you will take it out of the water and plant it into soil.

Remember the stem should be at least 8-10 inches from the pit and at this time is when you should plant. The stem should have tiny leaves as well.

Place the pit so half of it is covered into the soil and press firmly around it. You can start off by planting the small avocado in a container in a sunny location outdoors.

Remember to keep your new little plant in a sunny location and watered to help it flourish and grow into a tree.

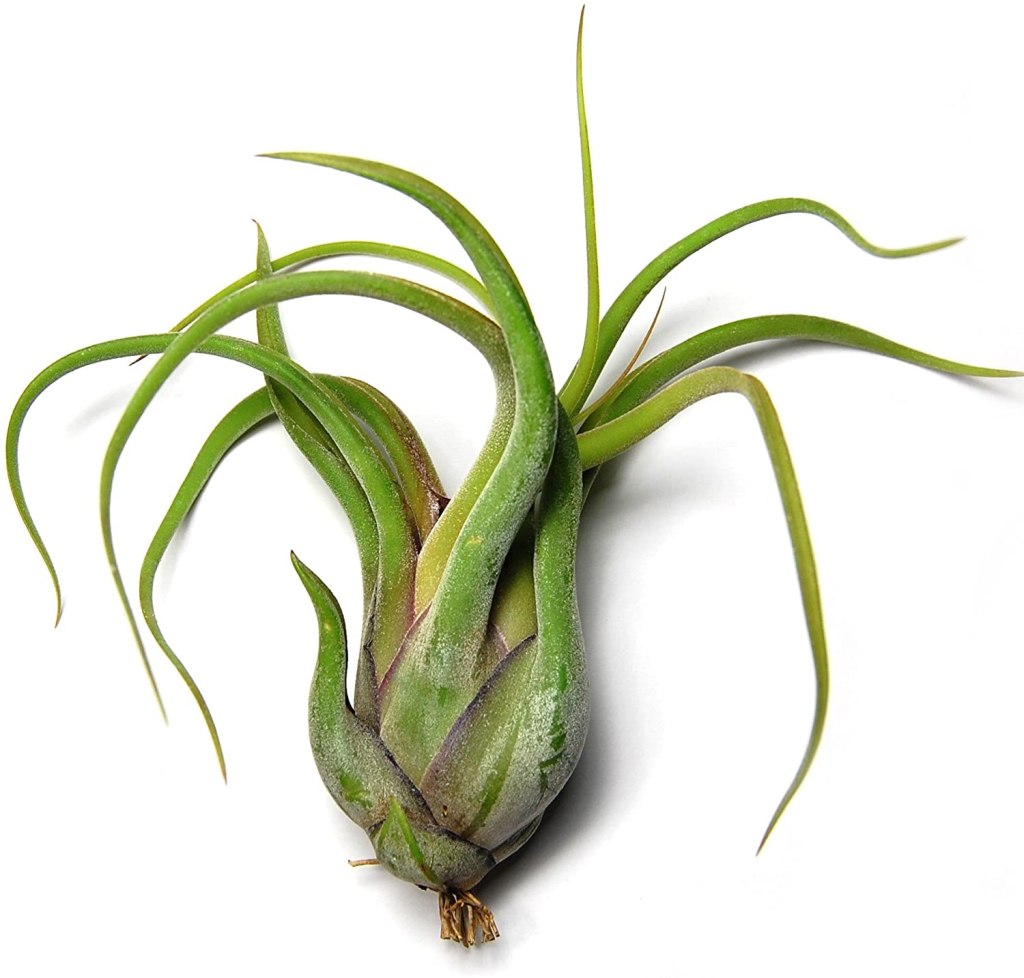
Blooming Air Plants

Do air plants bloom flowers?

Yes, every air plant will only bloom once in its lifetime. Once the flower has dried up, you should trim off the entire flower stalk, as this will promote “pupping. Tillandsia “Pups” are simply new plants forming at the base of the plant.

How do I get my air plant to bloom?

Most healthy Tillandsia will bloom eventually, but they require proper care and plenty of light in order to do so. To help speed up the blooming process, you can use a diluted fertilizer like our specially formulated Air Plant Food once per month or so to encourage blooms and pup production.

How long does it take for air plants to bloom?

In their natural habitat, it takes much longer for the air plants to bloom. The time of the bloom varies even in the same species of air plants let alone in different types. The same species of air plants that might bloom in 5-7 years in one environment might take around 25 years to bloom in another environment.

Flowering is the peak of the air plant life cycle, but also marks the beginning of the plant’s old age -after it flowers, the plant will eventually die. But don’t despair! Just before, during or after flowering, depending on the species, your air plant will reproduce by sending out 2-8 “pups”.

You can buy air plants at your local garden shop or at our Etsy shop http://www.printhousedesign.com

DIY Butterfly Feeders

If you are looking to add more butterflies to your garden this year, you may need to reevaluate the plants that you have in your flower garden. Or, you could just make your own DIY butterfly feeder and I have a list  to make ones that you can try.

Adding a butterfly feeder to your garden adds instant décor, especially if you try these DIY butterfly feeders. All of these are really decorative and beautiful. Plus, when you fill them with nectar, they attract so many butterflies! Butterflies are essential for helping to pollinate many flowers and plants and let’s face it, there is just nothing as lovely as seeing several butterflies in your yard. Adding a butterfly feeder to your garden is going to help you to attract these creatures and they will do the rest. 

You don’t have to have a jug or buy materials to make a great butterfly feeder. You can upcycle some old glass dishes to create one that is just as gorgeous as it is functional. Just grab those old glass plates, glasses, teacups or whatever you have on hand and fashion them into a lovely feeder that you can stand in your garden. This one is really easy to make and it is so gorgeous – plus it is a wonderful way to up cycle those old glass dishes.

This is a great project for the kids. You can take an old pie tin – one of the cheap ones that comes with premade pie crust – and turn it into a lovely DIY butterfly feeder. Let the little ones help you to create a hanger from beads and twine and then decorate the tin however you want. Butterflies will flock to this one and they can all eat at the same time so you may see hoards of them hovering over your garden at feeding time.

The next time you empty a can of something, save the can. You can turn it into a lovely hanging butterfly feeder. This one won’t cost you anything to build and it is a wonderful way to upcycle tin cans. Just decorate however you want and then fill the can with flowers and other items that butterflies love to eat. This is a great project for the kids, too and they can help to make sure that the can always has food for your butterflies.

You can DIY a butterfly feeder that also gives the little creatures the water that they need. I love how easy this one is. You just stack a couple of plates or terra cotta pieces and then hang them together. The top plate will be used to hold water and you can add nectar or fruit pieces or flowers that your butterflies love to eat to the bottom section. It’s an all in one buffet for your butterflies!

Hope these little ideas help you attract more butterflies to your flower garden this season.

Home is Where the Boat Is

Potting, Puttering & Pontooning

Cats and Trails and Garden Tales

Musings on cats, travel, gardens and life

Leaf And Twig

Where observation and imagination meet nature in poetry.

phillipsplace

A new beginning, mobile home living, adding our style inside and out.

Ruth E. Hendricks

Daily Journal of Life in Pittsburgh

The Haute Mommy Handbook

Motherhood Misadventures + Creative Living

Suzanne's Mom's Blog

Arts, Nature, Good Works, Luna & Stella Lockets & Birthstones

𝑻𝒐𝒓𝒏𝒂𝒅𝒐 𝑶𝒇 𝑪𝒉𝒂𝒐𝒔 🌪

Thoughts, experiences and learnings in a turbulent time

Sarah Rajkotwala - Author & Spiritual Teacher blog

Gardening Fairies Flowers Spirituality Angels Love Joy

Ideas and Advice for How To Live a Joyful and Empowered Life.

All Things Empowering - Healing Ourselves & Earth, Self-Sufficiency, Food Forests, Gardening, Art, Road Trips, Preserving, Foraging, Permaculture, Homesteading and More!

AmericaOnCoffee

We’re just inviting you to take a timeout into the rhythmic ambiance of our breakfast, brunch and/or coffee selections. We are happy whenever you stop by.

Heart to Hearth Cookery

Sharing my Experimental Archaeology of Food

The Herb Society of America Blog

Learn • Explore • Grow