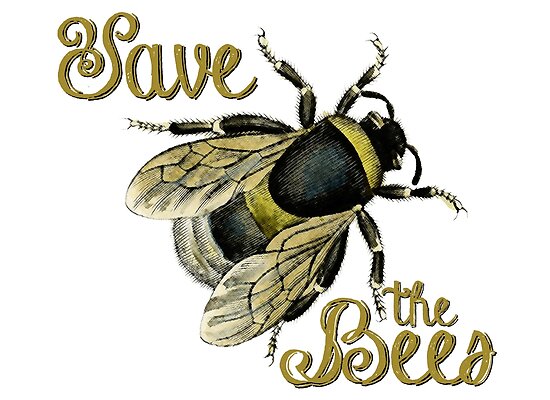
DIY Air Plant Terrarium

Flymeawaycreations  just hosted its first gardening workshop this past Saturday locally in Cedar Point, NC. The shop is expanding to host gardening workshops at least once a month to encourage others to learn all about different plants, while creating something fun. If you are not in the area, or missed the class that’s okay the shop will create a blog post giving you tips and steps on how to create the planter or terrarium that was created at the class.

Before I walk you through the steps on creating your very own Glass Air Plant Terrarium I wanted to share a little information about air plants!

Did you know that an air plant is a tropical American plant that grows on trees with long, narrow leaves that absorb water and nutrients from the atmosphere? There are roughly 500 different species of flowering perennial plants in the Tillandsia genus, a part of the Bromeliad family. These are plants that require no soil for their roots. Instead, they extract moisture from the air and can be found in tropical areas in trees. Not to mention countless hybrid varieties and no two air plant varieties are exactly the same!

How long do air plants last? It depends on how well you take care of the plant. It can live up to years if taken care properly, and some species can grow up to 3 feet long!

After walking through each step I will explain about taking care of your air plant as well. You can buy air plants at your local garden shop, Amazon, or Etsy. For this DIY project you will need these materials: Glass square vase (Terrarium), small rocks, sand, moss, seashells or pebbles, air plant. (cost for all materials $20-$25)

First step:  Start with your glass terrarium and place sand inside to cover the bottom of your glass. You could add about 1 inch of sand. This material will give your terrarium a coastal look.

Second step: Add a layer of rocks to your terrarium placing them on top of the layer of sand. You can add about 1-2 inches of rocks. This material will help your plant stay in place and give weight to your glass terrarium.

Third step: Add moss by layering it in the middle of the glass and add seashells, pebbles along the side of the moss or on top of the moss. (This is where you can be creative by adding several shape shells and different color pebbles).

Fourth & last step: Add your air plant on top of your moss. By placing your air plant on top of the moss gives the plant roots anchorage when growing. ( you can see small roots on the bottom of your plant-these grow and attach to the moss of tree in the wild)

Now, that you have created this beautiful terrarium how do you take care of your plant?

We know air plants need sunlight, so place your terrarium in indirect sunlight: a sunny room, not directly in a window sill or doorway. By allowing your plant to have indirect sunlight will prevent it from drying out faster. Your air plant will definitely need water. You will need to water your plant every other week, by soaking it into collected rain water or bottle water for up to 10 minutes.  (Keep an eye on the tip of your air plant, when you see the leaf tip curl or turn brown, this means your air plant needs water because it is dehydrated.  After soaking your air plant turn the plant up-side down on a paper towel to let it dry. Shake any built up water between the leaves off, by doing this it prevents the bottom of your air plant rotting and turning brown.  Lastly, keep your air plant in a well air vented area this will allow your air plant to get air circulation and nutrients for it to live.

After time, your air plant will bloom a small flower, but only once in its life time! Air plants (Tillandsia spp.) only flower once in their lives, but the flowers can last for several months, depending on the species. Throughout their lives they produce pups. If these are left in a clump the mother plant will die and its leaves can be pulled out leaving the pups. If the pups are removed when they are about a third to a half the size of the mother plant, the mother plant may live for several years and continue to produce pups.

If you have any questions or would like to learn more about air plants, you can read the blog “taking care of air plants” by Flymeawaycreations. Also, you can follow the shop on Facebook and Instagram to see the next local workshop class!

www.instagram.com/flymeawaycreations

https://www.facebook.com/flymeawaycreations


Sunflower Garden

Sunflowers remind me of warmer weather and the season of summer like no other plant. Native to North America, sunflowers are heat-tolerant, resistant to pests, and simply beautiful. You can even harvest their edible seeds. Here’s how to grow them in your garden! Most sunflowers are remarkably tough and easy to grow as long as the soil is not waterlogged. Most are heat and drought-tolerant. They make excellent cut flowers and many are attractive to bees and birds. Below are a few tips on how to create your own little sunflower garden.

PLANTING

Sunflowers grow best in locations with direct sunlight (6 to 8 hours per day); they require long, hot summers to flower well. Sunflowers have long tap roots that need to stretch out, so the plants prefer well-dug, loose, well-draining soil; in preparing a bed, dig down 2 feet in depth and about 3 feet across to ensure the soil isn’t too compact. Find a well-drained location, and prepare your soil by digging an area of about 2-3 feet in circumference to a depth of about 2 feet. If possible, put seeds in a spot that is sheltered from strong winds, perhaps along a fence or near a building.

It’s best to sow sunflower seeds directly into the soil after the danger of spring frost has passed. Ideally, the soil temperature has reached 55 to 60 degrees F (13–16°C).

Give plants plenty of room, especially for low-growing varieties that will branch out. Make rows about 30 inches apart. Plant the large seeds no more than 1 inch deep about 6 inches apart after the soil has thoroughly warmed, from mid-April to late May in northern regions—earlier in southern areas. You can plant multiple seeds and thin them to the strongest contenders when the plants are six inches tall.

CARE

While the plant is small, water around the root zone, about 3 to 4 in. from the plant. Once the plant is established, water deeply though infrequently to encourage deep rooting. Unless the weather is exceptionally wet or dry, water once a week with several gallons of water.

HARVEST & ADMIRE

For indoor bouquets, cut the main stem just before its flower bud has a chance to open to encourage side blooms. Cut stems early in the morning. Harvesting flowers during middle of the day may lead to flower wilting. Handle sunflowers gently. The flowers should last at least a week in water at room temperature. Arrange sunflowers in tall containers that provide good support for their heavy heads, and change the water every day to keep them fresh.

The towering ‘Mammoth’ Sunflower is the traditional giant sunflower, sometimes growing to more than 12 feet tall. Its seeds are excellent for snacks and natures own bird feeder, too! Sunflowers attract a variety of birds to your yard especially small finches! You can find these sunflower seed packets at Flymeawaycreations Etsy shop!


Follow the link below to find the seeds at the shop!

https://www.etsy.com/listing/687003601/grey-stripe-sunflower-seeds-non-gmo


Bee house DIY gardening

What’s the secret to enjoying more blooms and greater harvests? Pollination! To increase the pollination of your garden plants, consider getting a backyard bee house for native solitary bees!

Bee houses are similar to bird houses, but instead of attracting birds, they attract native solitary bee species. Unlike honey bees, these solitary bees are extremely docile and up to three times more effective as pollinators. No, you won’t get any honey, but you will enjoy better flowers, thriving plants, and healthier vegetables in your garden!

Many of these native bees are already a part of the local ecosystem, but providing them with a perfect place to nest in your backyard can improve their lives and yours.

Bee houses consist of a wooden, birdhouse-like structure containing native bee nesting materials—typically hollow reeds or cardboard tubes. They are the perfect habitat for solitary, hole-nesting bees, who also happen to be some of the best pollinators around.

You can find these cute bee houses at your local garden shop or even find DIY instructions on social media to create your own!

Below are a few tips to help start you in the right direction after buying or making your little Bee House!

  1. Make sure to choose a bee house size that matches what the surrounding area can provide. For example, a stand of flowering trees and bushes can provide more pollen than a meadow of flowers can, meaning a larger house would be appropriate for the former.
  2. Protection, Hole-nesting bees need a place to live that’s dry and safe. The ideal bee house will have a solid outer structure that has a 2–3” overhang, which will protect nesting materials from bad weather. If birds are attacking the nesting holes, use a 1”-wide wire cloth and bubble it around the bee house. Do not install wire cloth flush against the nesting holes, as this will obstruct the bees from entering. Bees need some space for landing and taking off!
  3. Location, Orient the bee house to face the morning sun, as hole-nesting bees need the sun’s warmth to give them energy to fly. Placing two bee houses—each facing a slightly different direction—can produce even better results.Most native bees prefer some afternoon shade, but too much shade could attract hole-nesting wasps. Solitary wasps are generally considered beneficial predators in a garden, as they attack pests like caterpillars, grubs, and aphids. However, they may also prey on the bee pupae in your bee house.
  4. Planting flowers; make sure you have a variety selection of flowers and even garden veggies for the bees to enjoy close by to their house. Flymeawaycreations Etsy shop has several flowering seeds such as Wildflower, Sunflower, and Lavender seed packets for you to start your very own Bee Garden!

www.Flymeawaycreations.com


You can follow the link to find instructions on how to create your own Bee house!

https://www.nwf.org/Garden-for-Wildlife/Young/Build-a-Bee-House

Window Sill Gardening

You can start your green thumb this year by beginning your garden in the window! There are a few important benefits to growing some plants indoors. The main one is that your garden is almost completely protected against pests and bad weather. It can also brighten up any room if you add colorful plants along your window in any room.

Ideally, you should have your plants in the south-facing windows to get the most light. Plants that prefer shade will do fine in any window, or even on a table in the middle of the room. Light that comes in through window glass gets magnified, so a plant can get very hot even though it’s indoors. Make sure you rotate your plants to prevent the leaves and stems leaning towards one side.

Water your plant when the soil is dry to the touch, and make sure you use containers that have a drainage hole in the bottom or side of the planter. You can use natural fertilizer or compost a few times throughout the season to help keep the nutrients up. The best plants for gardening indoors in the window are herbs and other leafy vegetables. Basil, mint, and thyme will do very well. Lettuce or fresh greens will also grow well sitting in the window. With indoor herbs, it’s not always enough to simply water when the soil is dry. For best results, mimic rainfall by spraying down the leaves in the kitchen sink once a week. Alternatively, spritz the foliage with a misting bottle every few days. Feed every few weeks with a natural liquid fertilizer; products intended for houseplants are generally sufficient. If insects like aphids or whiteflies appear, spray them with diluted soapy water.

You can try out some larger vegetables, but choose smaller plants whenever possible, particularly dwarf or mini versions. Not only do they take up less space, they will require less light and energy to produce for you. Cherry tomatoes and mini cucumbers are great examples!


You can visit Flymeawaycreations Etsy shop to find many indoor planters that would work great in any window sill with herbs, succulents, or air plants!

www.flymeawaycreations.com


Do’s & Don’ts for Growing Succulents

Here are a few tips for those who’ve never even considered developing a green thumb until this very moment. It’s likely your indoor greenery will find you when you are least prepared: given as gifts, or perhaps grabbing your attention while strolling through a local market. It’s important to know how to care for these eye catching plants, so practice these Do’s & Don’ts on how to care for succulents will start you on your gardening way!

Do’s for taking care of your succulents

Plant your succulents in an area that will receive at least a half day of sunshine. For more vibrant colors, plant them in an area with more sun. Make sure your succulents receive some level afternoon shade if you live in a warmer environment. You don’t want them to shrivel in the sun and they can if exposed for a long period of time.

Plant your succulent plant in well-draining soil! If planting your succulent in a container instead of in a garden bed, you should always line the bottom of your container with a layer of gravel. It’s absolutely terrific for drainage. Sometimes, it’s best if you use a cactus potting mix (sand & soil mixture) instead of a normal potting soil. It’s all about water retention with succulents! Try finding these types of succulents;  Hawthoria, Jade, or Gasteria variety. My favorite is Jade. They’re great for beginners and they provide your garden or terrarium with interesting colors and textures.

Place your succulents in containers medium size planters for growth. Make sure your container has holes for water to drain. Succulents don’t like to sit in waterlogged soil, so drainage is important to prevent rot.

Don’ts for taking care of your succulents

Over water your succulents! Really! I know you’ll be tempted because this was always my problem at first, I insisted they needed to be watered all the time! Succulents store water in their stems, so over watering is the fastest way to kill your succulents. Plants only need to be watered once weekly or Bi-weekly by doing this you will see little does go a long way!

Don’t spray with a spray bottle, regardless of what that one pin on Pinterest said. Succulents hate to be misted. When watering, you’ll want to water the soil directly. This is best for your little succulents to grow! Fertilize your succulent plants too much. Succulent plants only need to be fertilized once a month, if that much. Apply sparingly when you do feed them and then water thoroughly.

Don’t keep your little succulent in the same spot. Succulents love direct sun, but if yours is sitting in the same exact spot day after day, it’s likely that only one side is getting enough light. Rotating the plant often will help them stand up straight instead of leaning towards one side.

By following these do’s and don’ts should help you kick start your green-thumb for succulents! Flymeawaycreations Etsy shop creates unique planters that work great with succulents , each planter that is listed will note if it works well with succulents or air plants. You can follow the link below to see over 20 different style planters!

www.flymeawaycreations.com

Home is Where the Boat Is

Potting, Puttering & Pontooning

Cats and Trails and Garden Tales

Musings on cats, travel, gardens and life

Leaf And Twig

Where observation and imagination meet nature in poetry.

phillipsplace

A new beginning, mobile home living, adding our style inside and out.

Ruth E. Hendricks

Daily Journal of Life in Pittsburgh

The Haute Mommy Handbook

Motherhood Misadventures + Creative Living

Suzanne's Mom's Blog

Arts, Nature, Good Works, Luna & Stella Lockets & Birthstones

𝑻𝒐𝒓𝒏𝒂𝒅𝒐 𝑶𝒇 𝑪𝒉𝒂𝒐𝒔 🌪

Thoughts, experiences and learnings in a turbulent time

Sarah Rajkotwala - Author & Spiritual Teacher blog

Gardening Fairies Flowers Spirituality Angels Love Joy

Ideas and Advice for How To Live a Joyful and Empowered Life.

All Things Empowering - Healing Ourselves & Earth, Self-Sufficiency, Food Forests, Gardening, Art, Road Trips, Preserving, Foraging, Permaculture, Homesteading and More!

AmericaOnCoffee

We’re just inviting you to take a timeout into the rhythmic ambiance of our breakfast, brunch and/or coffee selections. We are happy whenever you stop by.

Heart to Hearth Cookery

Sharing my Experimental Archaeology of Food

The Herb Society of America Blog

Learn • Explore • Grow