The holidays come wrapped in twinkle lights, evergreen scents, and a to-do list that somehow multiplies every time we glance away. It’s a beautiful time of year… but it can also be a lot. Between gatherings, gifting, cooking, cleaning, hosting, and trying to create the perfect memories, it’s easy to lose sight of something really important:
You.
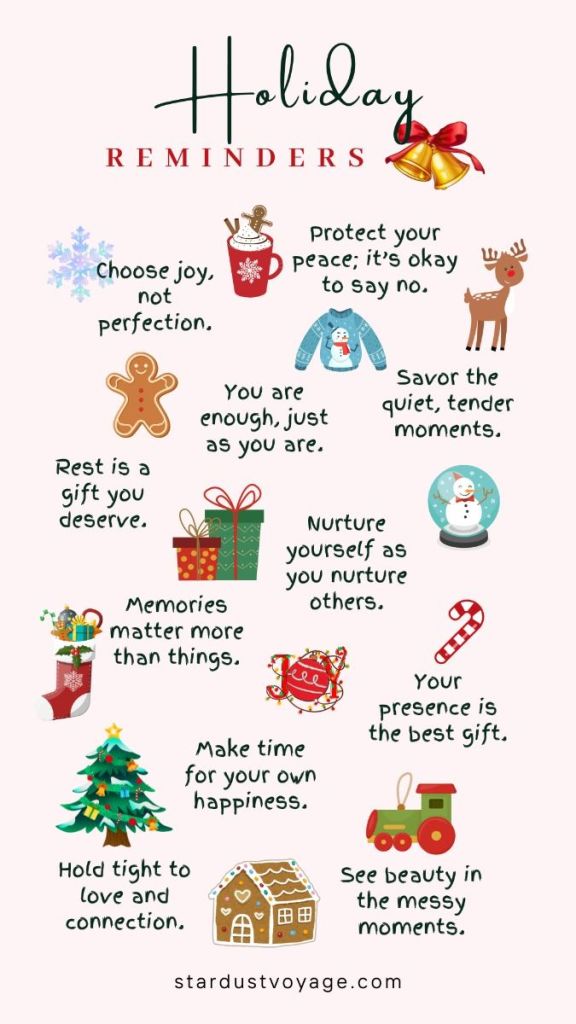
That’s why I wanted to share this sweet “Holiday Reminders” visual—little truths that we all need to hear, especially when December starts feeling like a sprint.
As you look through the reminders in the picture—gingerbread people, cozy sweaters, snow globes, little reindeer, twinkly trees—each one nudges you toward slowing down and remembering what actually matters.
Here are a few that hit especially close to home:
“Choose joy, not perfection.”
Let the cookies be crooked, the ribbon be wrinkled, and the tree lean a little to one side. Joy doesn’t come from perfect—it comes from presence.
“Protect your peace; it’s okay to say no.”
You don’t have to attend every invitation or fulfill every expectation. Your energy is a gift—spend it wisely.
“Rest is a gift you deserve.”
Yes, you. Curl up with a blanket and a cup of something warm. Take a nap. Step outside for a quiet breath of chilly air. Rest isn’t lazy; it’s necessary.
“Nurture yourself as you nurture others.”
You pour so much love into your family, friends, and community… don’t forget to pour some back into your own cup.
“Your presence is the best gift.”
You don’t need to buy the biggest, brightest, most Pinterest-worthy things. YOU—your laughter, your warmth, your heart—are enough.
“See beauty in the messy moments.”
Because honestly? Those imperfect, silly, chaotic moments are the ones that become the best stories later.
Give Yourself Permission to Pause
During this season, take a moment—several moments, actually—to feel your own heartbeat again. Slow down long enough to enjoy the scent of pine, the sparkle of lights, the quiet of early mornings, and the sweetness of simply being here.
Take time for small joys. Take time for real rest. Take time for you.
Because you deserve to feel the magic too.
Happy holidays, friend.
May your season be gentle, joyful, and full of tiny, tender moments that remind you just how enough you already are.