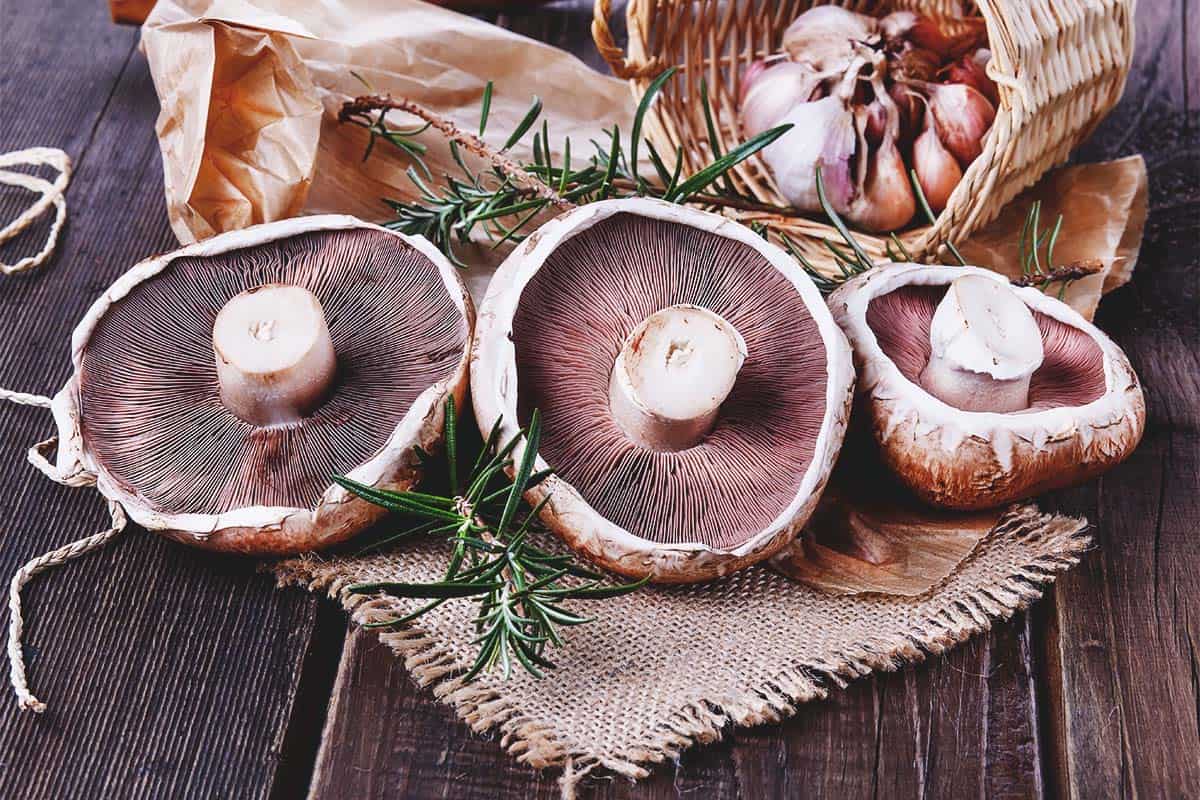
Flowers to pick & press

Capture the beauty of summer flowers by picking a few to press and preserve for later use in winter crafts. Even a couple of flowering stems will give you plenty of material if you press each bloom individually. Picking garden flowers doesn’t harm the plant, in fact it often means more new blooms will form as it delays the plant , but taking too much at once and being rough can spoil a garden display. 

Getting started

To press flowers for craft work, use the best-looking ones that have just opened and pick them on a dry day. Younger children can just pluck the flowers but older children can be given pruners to cut the flowers. Pretty cards and collages can be made just with the flower heads; or grasses or leaves, there is no need for long stems unless you want to dry flowers for arranging. In that case, the bunches need to be hung upside down in a warm, dry, dark place with good air circulation. You can buy or make a flower press by using a large heavy book. 

Directions:

Step 1: Begin by preparing your flower. Remove any unwanted leaves and lay flat on parchment paper.

Step 2: Open the book and place absorbent paper on the book’s pages. Large books like dictionaries and phone books work best for this because they are heavy and have many pages you can use. Make sure you choose a book that you don’t mind getting damaged. There is a chance that the water from the flower may cause the book pages to wrinkle.

Step 3: Position the blooms face down on parchment paper. Carefully close the book, making sure not to move the flowers.

Step 4: Place more books or other weighty objects on top of the book. Keep in a place that is out of the way and not likely to be knocked into.

Step 5: Let the flowers sit for 3-4 weeks. The longer you press the flowers, the less water will be left in them. Give them two to three weeks before removing them from the book. If they don’t have a papery feel, change out the parchment paper and let them sit for longer.

Once you’ve created your pressed flowers, you can put them on display!

Annuals for cut flowers

Sweet peas are a good flower to choose for summer picking. They are sown from seed in autumn or spring. If you pick regularly the flowers will keep blooming.

Cornflowers, particularly blue varieties, are great for drying and using in winter arrangements. 

Ammi majus has a white flower with light airy structure that is grown from seed. It provides a light frothy feel to flower arrangements.

Roses come in all different colors to choose from, and these are easy to find in your local grocery store already in flower arrangement bouquets to take home.

It’s important that you are using the correct flowers so that you get the best results. Some of this will be trial and error, but following these rules will help. Try choosing a variety of focal flowers and greenery and filler flowers for a unique look. Follow our next blog that will be posted Wednesday 8/18/2021: DIY botanical print

How to make seed bombs

Whether it’s a plant pot, flowerbed, a patch in your yard, or an entire meadow, sowing wildflowers provides vital resources to support a wide range of insects that couldn’t otherwise survive in urban or built-up areas.

Throwing, breaking up or digging ‘seed bombs’ (or balls) into areas in your garden that need a little brightening up is a perfect way of spending an afternoon!

Materials that are needed:

  • Meadow flower seeds or seeds collected from the garden.
  • Peat-free compost.
  • Water.
  • Powdered clay (found in craft shops).
  • Mixing bowl.

Creating you seed bomb

  1. In a bowl, mix together 1 cup of seeds with 5 cups of compost and 2-3 cups of clay powder (you could use clay soil instead if you have it).
  2. Slowly mix in water with your hands until everything sticks together.
  3. Roll the mixture into firm balls.
  4. Leave the balls to dry in a sunny spot.
  5. Now for the fun bit! Plant your seed bombs by throwing them at bare parts of the garden and wait to see what pops up! ( make sure to add a little water to your seed bombs if they are completely dry to help them germinate.

Do seed bombs actually work?

Seeds require moisture to germinate. … If you then let the seed bomb dry out, or even if you toss it while damp into a green space that then does not immediately get some good rain showers, the seeds will cease germination and die. So the seed bomb is less likely to work. 

What seeds are good for seed bombs?

Some of my favorite seeds for seed bombs include: wildflowers (native to your area), alyssum, lobelia, butterfly milkweed, scarlet sage, sunflower, basil, cilantro, lettuce or tomatoes all of which grow easily from seed. Putting together your seed balls is very simple just follow the steps above. 

Where do you plant seed balls?

Seed Ball Tips:

Do not bury Seed Balls.

Do not break up the balls, they are more successful if kept intact.

Place in an area with full sun and well-drained soil.

You can also find packets of wildflower paper seeds shaped in hearts at Printhousedesign1 on Etsy. 

Vases, Vessels, and other Containers

Any container that holds water can hold flowers. Coffee pots, cans, apothecary jars, antique pewter vessels, glasses, or concrete urns. If you are drawn to a container that doesn’t hold water, such as a wooden box, wicker baskets, or rusty bucket, use a plastic container within the unique vase and build your bouquets from there. 

Tall cylindrical vases might work for longer stems, like tulips, but they don’t lend themselves to fuller arrangements. Instead look for vessels that have a wider opening at the top. It’s best to match your container to the mood of an event. A casual country-style reception might call for mason jars, water pitchers, or ceramic pots. A more formal celebration could use silver-plated tea sets, fancy pedestal bowls, or crystal goblets. 

Narrow-necked bottles and bud vases are good for single stems and can be arranged in groups. They can wander down a dinner table or sit at every place setting. Silver tea services, with their matching sugar bowls and smile pieces. Beakers, flasks, and other laboratory glassware are striking, modern containers. 

Going to flea markets, antique shops, and consignment stores can be perfect places to find that unique vase, vessel for your bouquet flowers!  If you love animals, check out Printhousedesign.com on Etsy and see unique planters that are 3D printed in over 50 different animals! 

Colocasia Plant Tips

Colocasia known as Elephant ears. They can be grown indoors or planted outside. Colocasia have a more spreading habit and their leaves typically have a velvety surface texture. Elephant ears can easily hold their own as a solo plant in the garden or in a large container.

 Below are a few plant care tips to help your colocasia to flourish. 

  • Care Difficulty – Easy
  • Provide a bright, indirect location with minimal sunlight. Sites that are too bright will cause bleached leaves and sun-scorch, whereas shady areas will result in soil mould and root rot. It’s best to locate Colocasia with overhead lighting, as their growth structure may topple over when situated too far from a light source.
  • Allow the top third to dry out in between waters, reducing this further in the autumn and winter; over-watering is the most common issue with Colocasia, so always be cautious with your regime.
  • Keep an eye out for Spider Mites that’ll form webs on the under-leaves of the plant, Aphids that’ll attack the juvenile growth.
  • Especially with those kept in a dark location, gently rinse the foliage monthly to increase the light-capturing efficiency.
  • Repot every three years using a ‘Houseplant’ potting mix, or a general-purpose compost with some perlite. Introduce some grit for larger specimens to strengthen their root system.
  • Bright overhead lighting is best for wholesome (360º) growth, as locations too far from the window will cause dramatic phototropism. Although the excessive sunlight should be avoided at all costs, an hour or two of winter sun will provide vital nourishment to get it through the dormancy period.
  • Allow the top third to dry out in between waters, reducing this further in the autumn and winter. Under-watering symptoms include stunted growth, brown leaf edges and yellowing leaves. These issues are commonly caused by being pot bound, too much sunlight or heat, or pure forgetfulness. Over-watering symptoms include a collapsed base, yellowing older leaves, mouldy soil and plant death. If you feel that root rot is to blame, remove the affected leaves, roots, and soil, and replace with a fresh batch of houseplant compost

If you have any more helpful tips please comment below….

Growing Calamondin Citrus Tree

With its glossy-green foliage and abundant, golden fruit, this  citrus tree is a great starter plant.  If you’re new to growing citrus trees as houseplants, I highly recommend starting with an indoor/ patio-tolerant Calamondin Orange. Small but abundant, bright-orange fruits appear at regular intervals on this cross between a Kumquat and Mandarin Orange. Calamondin oranges are quite tart and a good substitute for Persian limes in most recipes. Their tangy juice and sweet zest is delicious in many drinks, desserts, & savory dishes.

When potting your newly acquired citrus tree, choose a ceramic, clay or plastic pot with adequate drainage. Ensure that the selected container has several holes at the bottom, and fill the drainage dish with gravel or stone to allow good moisture release and airflow. Well-drained soil is also critical. Buy pre-mixed potting soil and mix with compost to give it more nutrients. 

Citrus trees need 8-12 hours of sunlight per day. During the fall and winter months, place your Calamondin in a draft-free, south-facing window with even temperatures (55-85°F is ideal). Avoid locating the tree where temperatures fluctuate radically: such as near wood stoves, ovens, radiators or exterior doors. Calamondin Orange Trees may be moved outside in late spring (after the last frost date in your area). Be sure to slowly acclimate your tree to outdoor conditions by placing it in a protected spot.

Water your tree regularly and cover the soil with  mulch to help reduce evaporation and temperature fluctuation at the root zone. Soil should be kept on the drier side during winter months to avoid root rot and fungal infections. Like most tropical beauties, Calamondins enjoy humidifiers and/or regular misting as well.

Calamondin oranges take about one year to ripen from the time blossoms appear. However, because the tree will produce flowers and fruit at the same time, harvests can happen over a period of weeks or months. Snip bright orange fruit from branches with sharp snips to avoid tearing the tender skin. You’ll know the oranges are ripe when they are just soft enough to give slightly under the pressure of your fingertips.

With proper attention and care, a Calamondin Orange Tree will provide many golden harvests of fruit and years of beauty, inside and out.

Home is Where the Boat Is

Potting, Puttering & Pontooning

Cats and Trails and Garden Tales

Musings on cats, travel, gardens and life

Leaf And Twig

Where observation and imagination meet nature in poetry.

phillipsplace

A new beginning, mobile home living, adding our style inside and out.

Ruth E. Hendricks

Daily Journal of Life in Pittsburgh

The Haute Mommy Handbook

Motherhood Misadventures + Creative Living

Suzanne's Mom's Blog

Arts, Nature, Good Works, Luna & Stella Lockets & Birthstones

𝑻𝒐𝒓𝒏𝒂𝒅𝒐 𝑶𝒇 𝑪𝒉𝒂𝒐𝒔 🌪

Thoughts, experiences and learnings in a turbulent time

Sarah Rajkotwala - Author & Spiritual Teacher blog

Gardening Fairies Flowers Spirituality Angels Love Joy

Ideas and Advice for How To Live a Joyful and Empowered Life.

All Things Empowering - Healing Ourselves & Earth, Self-Sufficiency, Food Forests, Gardening, Art, Road Trips, Preserving, Foraging, Permaculture, Homesteading and More!

AmericaOnCoffee

We’re just inviting you to take a timeout into the rhythmic ambiance of our breakfast, brunch and/or coffee selections. We are happy whenever you stop by.

Heart to Hearth Cookery

Sharing my Experimental Archaeology of Food

The Herb Society of America Blog

Learn • Explore • Grow